A common pattern in iOS applications is to present a list of items and allow the user to tap an item to view or edit it. This pattern is typically enabled by embedding a List view inside a NavigationStack. The NavigationStack then presents a detail View whenever an item in the list is selected.
The title of the screens displayed in the NavigationStack is controlled by the .navigationTitle() modifier. I’ve always passed a String to the modifier as shown on line #20 below.
10struct EditRollView: View {
11    @Bindable var roll: Roll
12
13    var body: some View {
14        Form {
15            Section("Information") {
16                TextField("Name", text: $roll.name)
17            }
18
19        }
20        .navigationTitle(roll.name)
21        .navigationBarTitleDisplayMode(.inline)
22    }
23}
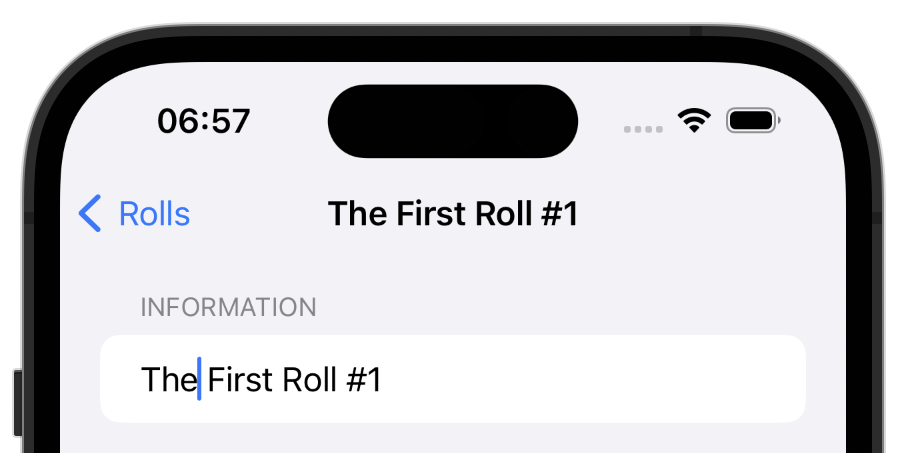
In this example, the title of the detail view is set to the value of roll.name which is a String. The screenshot below shows what this example looks like.

Screenshot showing a standard NavigationBar title
Making this title editable turned out to be easier than I realised. I wanted an editable title bar but filed it as a feature for the future, wrongly assuming that I’d need to customise the NavigationStack. Then a typo revealed the solution.
Passing a Binding to the .navigationTitle() modifier will give you an editable title. See line #20 below.
10struct EditRollView: View {
11    @Bindable var roll: Roll
12
13    var body: some View {
14        Form {
15            Section("Information") {
16                TextField("Name", text: $roll.name)
17            }
18
19        }
20        .navigationTitle($roll.name)
21        .navigationBarTitleDisplayMode(.inline)
22    }
23}
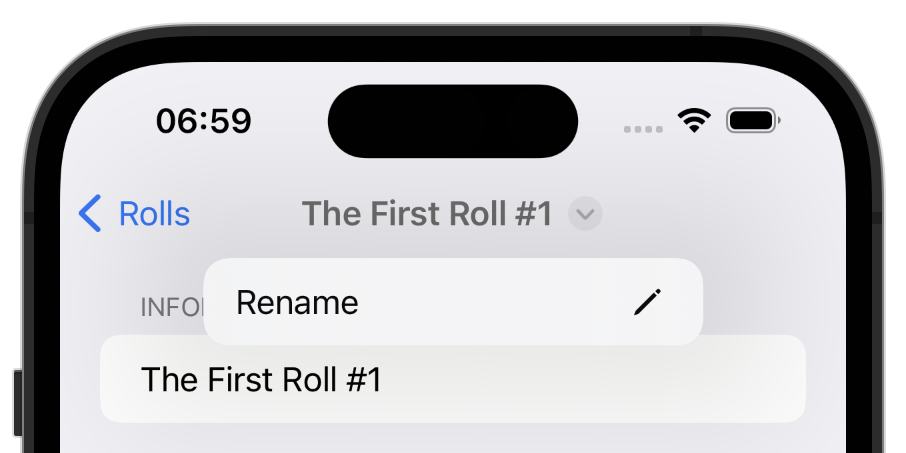
In the screenshot below you can see the little drop down arrow next to the title. This reveals a pop-up menu with one item in it, “Rename”. Because the title is bound to the underlying model, changes here are reflected in the model passed to the view.

Screenshot showing an editable NavigationBar title
I’m so used to looking up how to do something before I try it. It’s nice to stumble across the solution by chance.