The sidecar is a multi-container pattern used to provide additional functionality to a containerised-application without requiring changes to the application itself. The sidecar is the foundation of popular tools like the Istio service mesh. But how does it work?
In this post, I will demonstrate how to use the Sidecar pattern to add TLS termination to an existing application using a custom-built proxy server. In reality, there should be no reason to build everything from scratch, I’ve done so here to validate my understanding of how things work. This post has been written so that you can read along without implementing the examples, but if you want to get your hands dirty and code along, I’ve made a few assumptions:
- you know how to build simple Go applications
- you know how to create and publish Docker images
- you have access to a Kubernetes cluster
If you have any questions or get stuck, you can find me on Mastodon or Twitter.
The Sidecar Pattern
The Kubernetes Pod
Before we can explore the sidecar, it would help to understand a little about Pods in Kubernetes. Pods represent the smallest deployable unit of work. Each pod wraps one or more containers into an object that can be deployed and scheduled on a cluster.
“A Pod is the basic execution unit of a Kubernetes application–the smallest and simplest unit in the Kubernetes object model that you create or deploy. A Pod represents processes running on your Cluster.” – Pod Overview
The most common use-case (and recommended as the default pattern) is for Pods to wrap a single container. There are situations where it is useful to deploy multi-container pods. Containers inside a Pod share a common namespace. Containers that share a common namespace can share the loopback interface, use inter-process communication (IPC) or share the underlying filesystem.
There are several common use-cases for deploying multi-container pods. These have resulted in the emergence of three design patterns.
- The Sidecar Pattern
- The Ambassador Pattern
- The Adapter Pattern
In practical use, the term ‘sidecar’ commonly refers to all three patterns.
Patterns
Sidecar
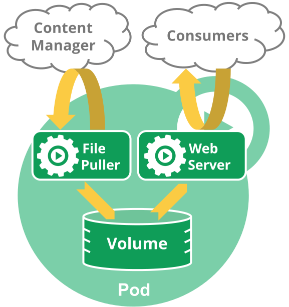
In the sidecar pattern, the secondary container enhances the main application by providing new functionality.
Examples:
- synchronising files on a web-server with a Git repository
- shipping logs to a blob store such as s3
- providing operational capabilities such as rate limiting
- providing TLS termination to secure inter-Pod traffic
Adapter
Applications often exhibit differences in their externally facing interfaces. These differences often increase operational overheads. The adapter pattern uses a secondary container to standardise external interfaces.
Examples:
- standardise log formats (e.g. multi-line log messages)
- provide common metrics for applications
Ambassador
The ambassador pattern simplifies access to external services. The secondary container exposes external services over localhost, removing the need to reconfigure applications as they move between environments.
Examples:
- an instance of the Google Cloud SQL Proxy
- a proxy acting as a client for a multi-node Redis cluster
Multi Container Pods
In the remainder of this post, I’m going to walk through the deployment of the sidecar pattern.
We start with a multi-container Pod. This sample.yaml file shows a Pod with two containers. These containers share the same lifecycle, but they don’t work together. This Pod contains multiple containers, but it does not follow the patterns we have seen so far.
---
apiVersion: v1
kind: Pod
metadata:
  name: myapp-pod
  labels:
    app: myapp
spec:
  containers:
  - name: main-container
    image: busybox
    command: ['sh', '-c', 'echo Hello Container 1! && sleep 30']
  - name: sidecar-container
    image: busybox
    command: ['sh', '-c', 'echo Hello Container 2! && sleep 30']
kubectl apply -f sample.yaml
Confirm that we have a single pod and two containers.
billglover@Bills-MacBook ~/d/sidecar> kubectl get pods
NAME                       READY   STATUS    RESTARTS   AGE
sample-sidecar             2/2     Running   0          85s
Check that both containers ran by viewing the logs. Remember that, with multi-container pods, you need to specify the container as well as the Pod.
billglover@Bills-MacBook ~/d/sidecar> kubectl logs sample-sidecar main-container
Hello Container 1!
billglover@Bills-MacBook ~/d/sidecar> kubectl logs sample-sidecar sidecar-container
Hello Container 2!
We have successfully deployed two otherwise independent containers that share a common lifecycle. In the next section, We’ll expand on this and introduce a sidecar.
A Sidecar From Scratch
To demonstrate how a sidecar works together with an existing application to enhance its behaviour, we are going to add HTTPS support to an application. We simulate the presence of an application that listens for HTTP by using a default deployment of Nginx. We then build a proxy and deploy it as a sidecar to add HTTPS support.
We could update the Nginx configuration to use HTTPS but this is a contrived example. Not all applications are this flexible.
The plan:
- Deploy Nginx to listen over an insecure connection (
HTTP). - Build a proxy sever to provide TLS termination (
HTTPS). - Deploy the proxy as a secondary container alongside the existing Nginx container.
- Modify Pod level routing so that all traffic goes via the proxy.
Under normal circumstances I wouldn’t advocate building these components from scratch, but in the interest of exploring how this is done, this is what we’ll do.
Our Insecure Application
Begin by deploying an instance of Nginx. We also need to deploy a Service instance to allow us to access the Nginx container from outside our cluster. Both the Pod and the Service definition are shown in pod.yaml below.
---
apiVersion: v1
kind: Pod
metadata:
  labels:
    run: nginx
  name: nginx
spec:
  containers:
  - image: nginx
    name: nginx
    ports:
    - containerPort: 80
      protocol: TCP

---
apiVersion: v1
kind: Service
metadata:
  name: nginx
spec:
  ports:
  - port: 80
    protocol: TCP
    targetPort: 80
  type: NodePort
  selector:
    run: nginx
Deploy the Pod and the service to the cluster.
kubectl apply -f pod.yaml
You should see the following confirmation that both the Pod and the service have been created successfully.
pod/nginx created
service/nginx created
You can retrieve the NodePort of the service with the following command.
kubectl get service nginx -o jsonpath="{.spec.ports[0].nodePort}"
You should now be able to see your application running by pointing your browser to localhost using the port obtained above.
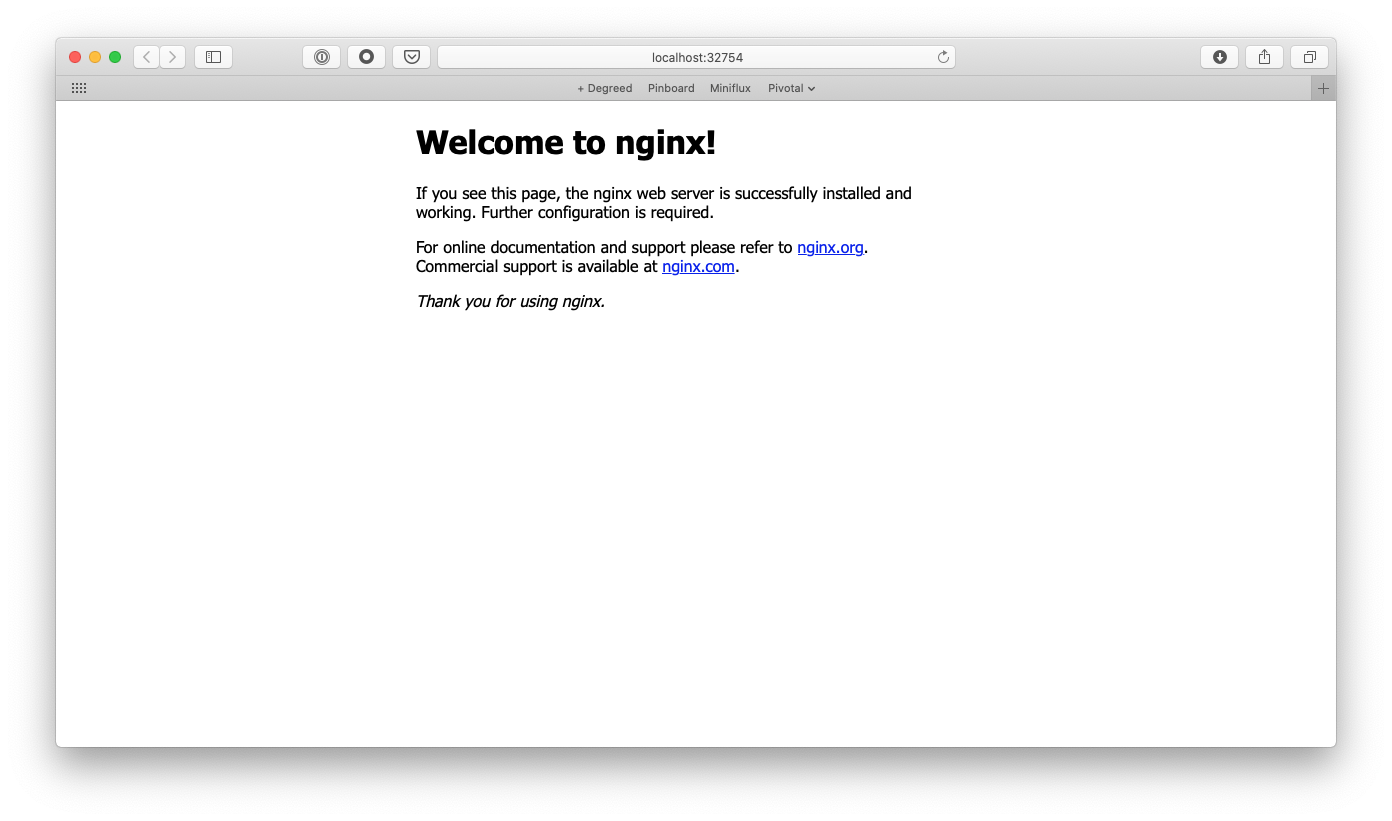
Welcome to Nginx
Build a Proxy Server
Now that we have Nginx listening for HTTP requests, we need to build a proxy server that will terminate HTTPS requests and forward them to Nginx. For this I’m going to use Go. If you decide to tackle this in a different language, I’d be very interested in seeing how you approached it.
package main

import (
	"flag"
	"fmt"
	"net/http"
	"net/http/httputil"
	"net/url"
	"os"
)

type proxy struct {
}

func proxyRequest(svc *url.URL) http.HandlerFunc {
	rp := httputil.NewSingleHostReverseProxy(svc)

	return func(w http.ResponseWriter, r *http.Request) {
		rp.ServeHTTP(w, r)
	}
}

func main() {

	cert := flag.String("cert", "server.crt", "TLS certificate")
	key := flag.String("key", "server.key", "TLS key")
	flag.Parse()

	svc, _ := url.Parse("http://localhost:80")
	http.Handle("/", proxyRequest(svc))
	err := http.ListenAndServeTLS(":8080", *cert, *key, nil)
	if err != nil {
		fmt.Fprintln(os.Stderr, err)
		os.Exit(1)
	}
}
Our proxy server needs some certificates to serve TLS traffic. We use OpenSSL to generate a self-signed certificate/key pair.
openssl req -newkey rsa:2048 -nodes -keyout server.key -subj '/CN=localhost' -x509 -days 7 -out server.crt
When executed, this application listens for HTTPS traffic on port :8080 and proxies that traffic through as an HTTP request to port :80 on localhost.
In a robust system, we’d manage these certificates in a way that allowed us to rotate them regularly. We certainly wouldn’t push them in a container image to a public container repository. But simplicity is a wonderful excuse and so we’ll ignore best practice and do exactly that.
Before we can deploy our Go application, we need to build it and package it as a container image that can be deployed to our cluster. The following Dockerfile uses a multi-stage build process to create a small container that runs our proxy server.
FROM golang:alpine as build

RUN apk add --update --no-cache ca-certificates git
RUN adduser -D -g '' appuser
RUN mkdir /src
WORKDIR /src
COPY . .

RUN go mod download

RUN CGO_ENABLED=0 GOOS=linux GOARCH=amd64 go build -a -installsuffix cgo -ldflags="-w -s" -o /app ./cmd/proxy/

FROM scratch
COPY --from=build /etc/ssl/certs/ca-certificates.crt /etc/ssl/certs/
COPY --from=build /etc/passwd /etc/passwd
COPY --from=build /app /app
COPY --from=build /src/server.crt /server.crt
COPY --from=build /src/server.key /server.key

USER appuser
EXPOSE 8080

ENTRYPOINT ["/app", "--cert", "server.crt", "--key", "server.key"]
Build and publish the container image to Docker Hub. Be sure to replace the repository name with your own or you won’t have permission to push your images.
docker build -t billglover/sidecar:0.0.1 .
docker push billglover/sidecar:0.0.1
At this point it is worth highlighting that we have cut a few corners to get here. If you want to spend more time on this, I would start by addressing the following issues:
- ports and hosts are hard coded
- certificates are baked into the image
- proxy doesn’t handle all http/2 traffic
For now though, our proxy container should be good enough.
Deploy Our Proxy Server
Before we deploy our proxy container, we have one more thing to consider, routing. Connections to port 80 on our existing Pod are routed to the Nginx container as in the following diagram.
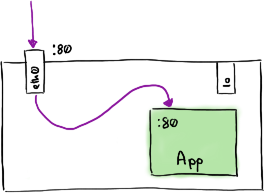
Application running in a Pod
We need to modify the Pod routing rules to route connections on Port 80 to our proxy, and allow our proxy to route traffic back to Nginx. The aim here is to leave the Nginx configuration unchanged.
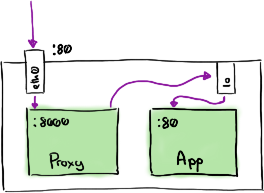
Application running in a Pod with sidecar
We can use an init container to do just this. An init container is a container that runs before the application containers in a Pod. We can use this to modify routing rules. The following Dockerfile-InitContainer creates a container that modifies the routing rules using iptables and then terminates.
FROM ubuntu:latest
RUN apt-get update && \
    apt-get install -y iptables
ENTRYPOINT ["iptables"]
CMD ["-t", "nat", "-A", "PREROUTING", "-p", "tcp", "-i", "eth0", "--dport", "80", "-j", "REDIRECT", "--to-port", "8080"]
Build and push the container image to Docker hub as before, remembering to change the repository name as appropriate.
docker build -t billglover/sidecar-init:0.0.1 -f Dockerfile-InitContainer .
docker push billglover/sidecar-init:0.0.1
We now have three container images:
nginxbillglover/sidecar:0.0.1billglover/sidecar-init:0.0.1
We are ready to deploy our sidecar using the nginx-sidecar.yaml definition shown below. You’ll notice that the definition of the nginx container and the nginx service remain unchanged.
---
apiVersion: v1
kind: Pod
metadata:
  labels:
    run: nginx
  name: nginx
spec:
  initContainers:
  - name: init-networking
    image: billglover/sidecar-init:0.0.1
    securityContext:
      capabilities:
        add:
        - NET_ADMIN
      privileged: true
  containers:
  - image: nginx
    name: nginx
    ports:
    - containerPort: 80
      protocol: TCP
  - name: proxy
    image: billglover/sidecar:0.0.1
    ports:
    - containerPort: 8080

---
apiVersion: v1
kind: Service
metadata:
  name: nginx
spec:
  ports:
  - port: 80
    protocol: TCP
    targetPort: 80
  type: NodePort
  selector:
    run: nginx
Remove your existing Pod and Service before deploying the sidecar.
kubectl delete -f nginx.yaml
kubectl apply -f nginx-sidecar.yaml
Confirm that both containers now in the Running state.
kubectl get pods
NAME    READY   STATUS    RESTARTS   AGE
nginx   2/2     Running   0          5m8s
Get the NodePort exposed by our service.
kubectl get services
NAME         TYPE        CLUSTER-IP       EXTERNAL-IP   PORT(S)        AGE
kubernetes   ClusterIP   10.96.0.1        <none>        443/TCP        73d
nginx        NodePort    10.105.156.139   <none>        80:32180/TCP   12s
You should then be able to query the nginx service using HTTPS with all the warnings that come with using self-signed certificates.
Welcome to Secure Nginx
Congratulations, you have built and deployed your own sidecar.
Summary
In this post, we have seen how to deploy multi-container Pods on Kubernetes. We have also seen how Init Containers can be used to modify Pod behaviour before the app containers start. Together these techniques allowed us to deploy a sidecar container that added HTTPS functionality to an existing application.
But why does this matter? Why is it useful to understand how a sidecar works? The Sidecar pattern is what underpins popular tools like Istio. Knowing a little bit about how these tools work can go a long way to making informed decisions about how (or even if) they are deployed.
If you have any questions or get stuck following these instructions, you can find me on Mastodon or Twitter.