The imagination of a child can bring a Lego city to life. I can still remember my dad helping me build an automated “Mind the Gap” announcement for the 12V Lego railway system. It was a classic case of over-engineering; completely unnecessary but so much fun.
A microswitch carefully placed at the end of a station platform joined two pins on a parrallel port cable (the wide ones that we used to use to connect printers). A BASIC program running in an infinite loop handled switch de-bouncing and then started a sequence of beeps accompanied by text on an orange display to warn the little Lego figures they needed to Mind the Gap when leaving the train. I loved it.
Many years on, it is now my turn to add that touch of magic to my son’s creations. In this particualr case, his re-creation of our local bus route. With no other cars on the road, he was left to imagine the junctions, traffic lights and even the occasional traffic jam. But I saw an opportunity. It couldn’t be too hard to add some model traffic lights to his bus route could it?
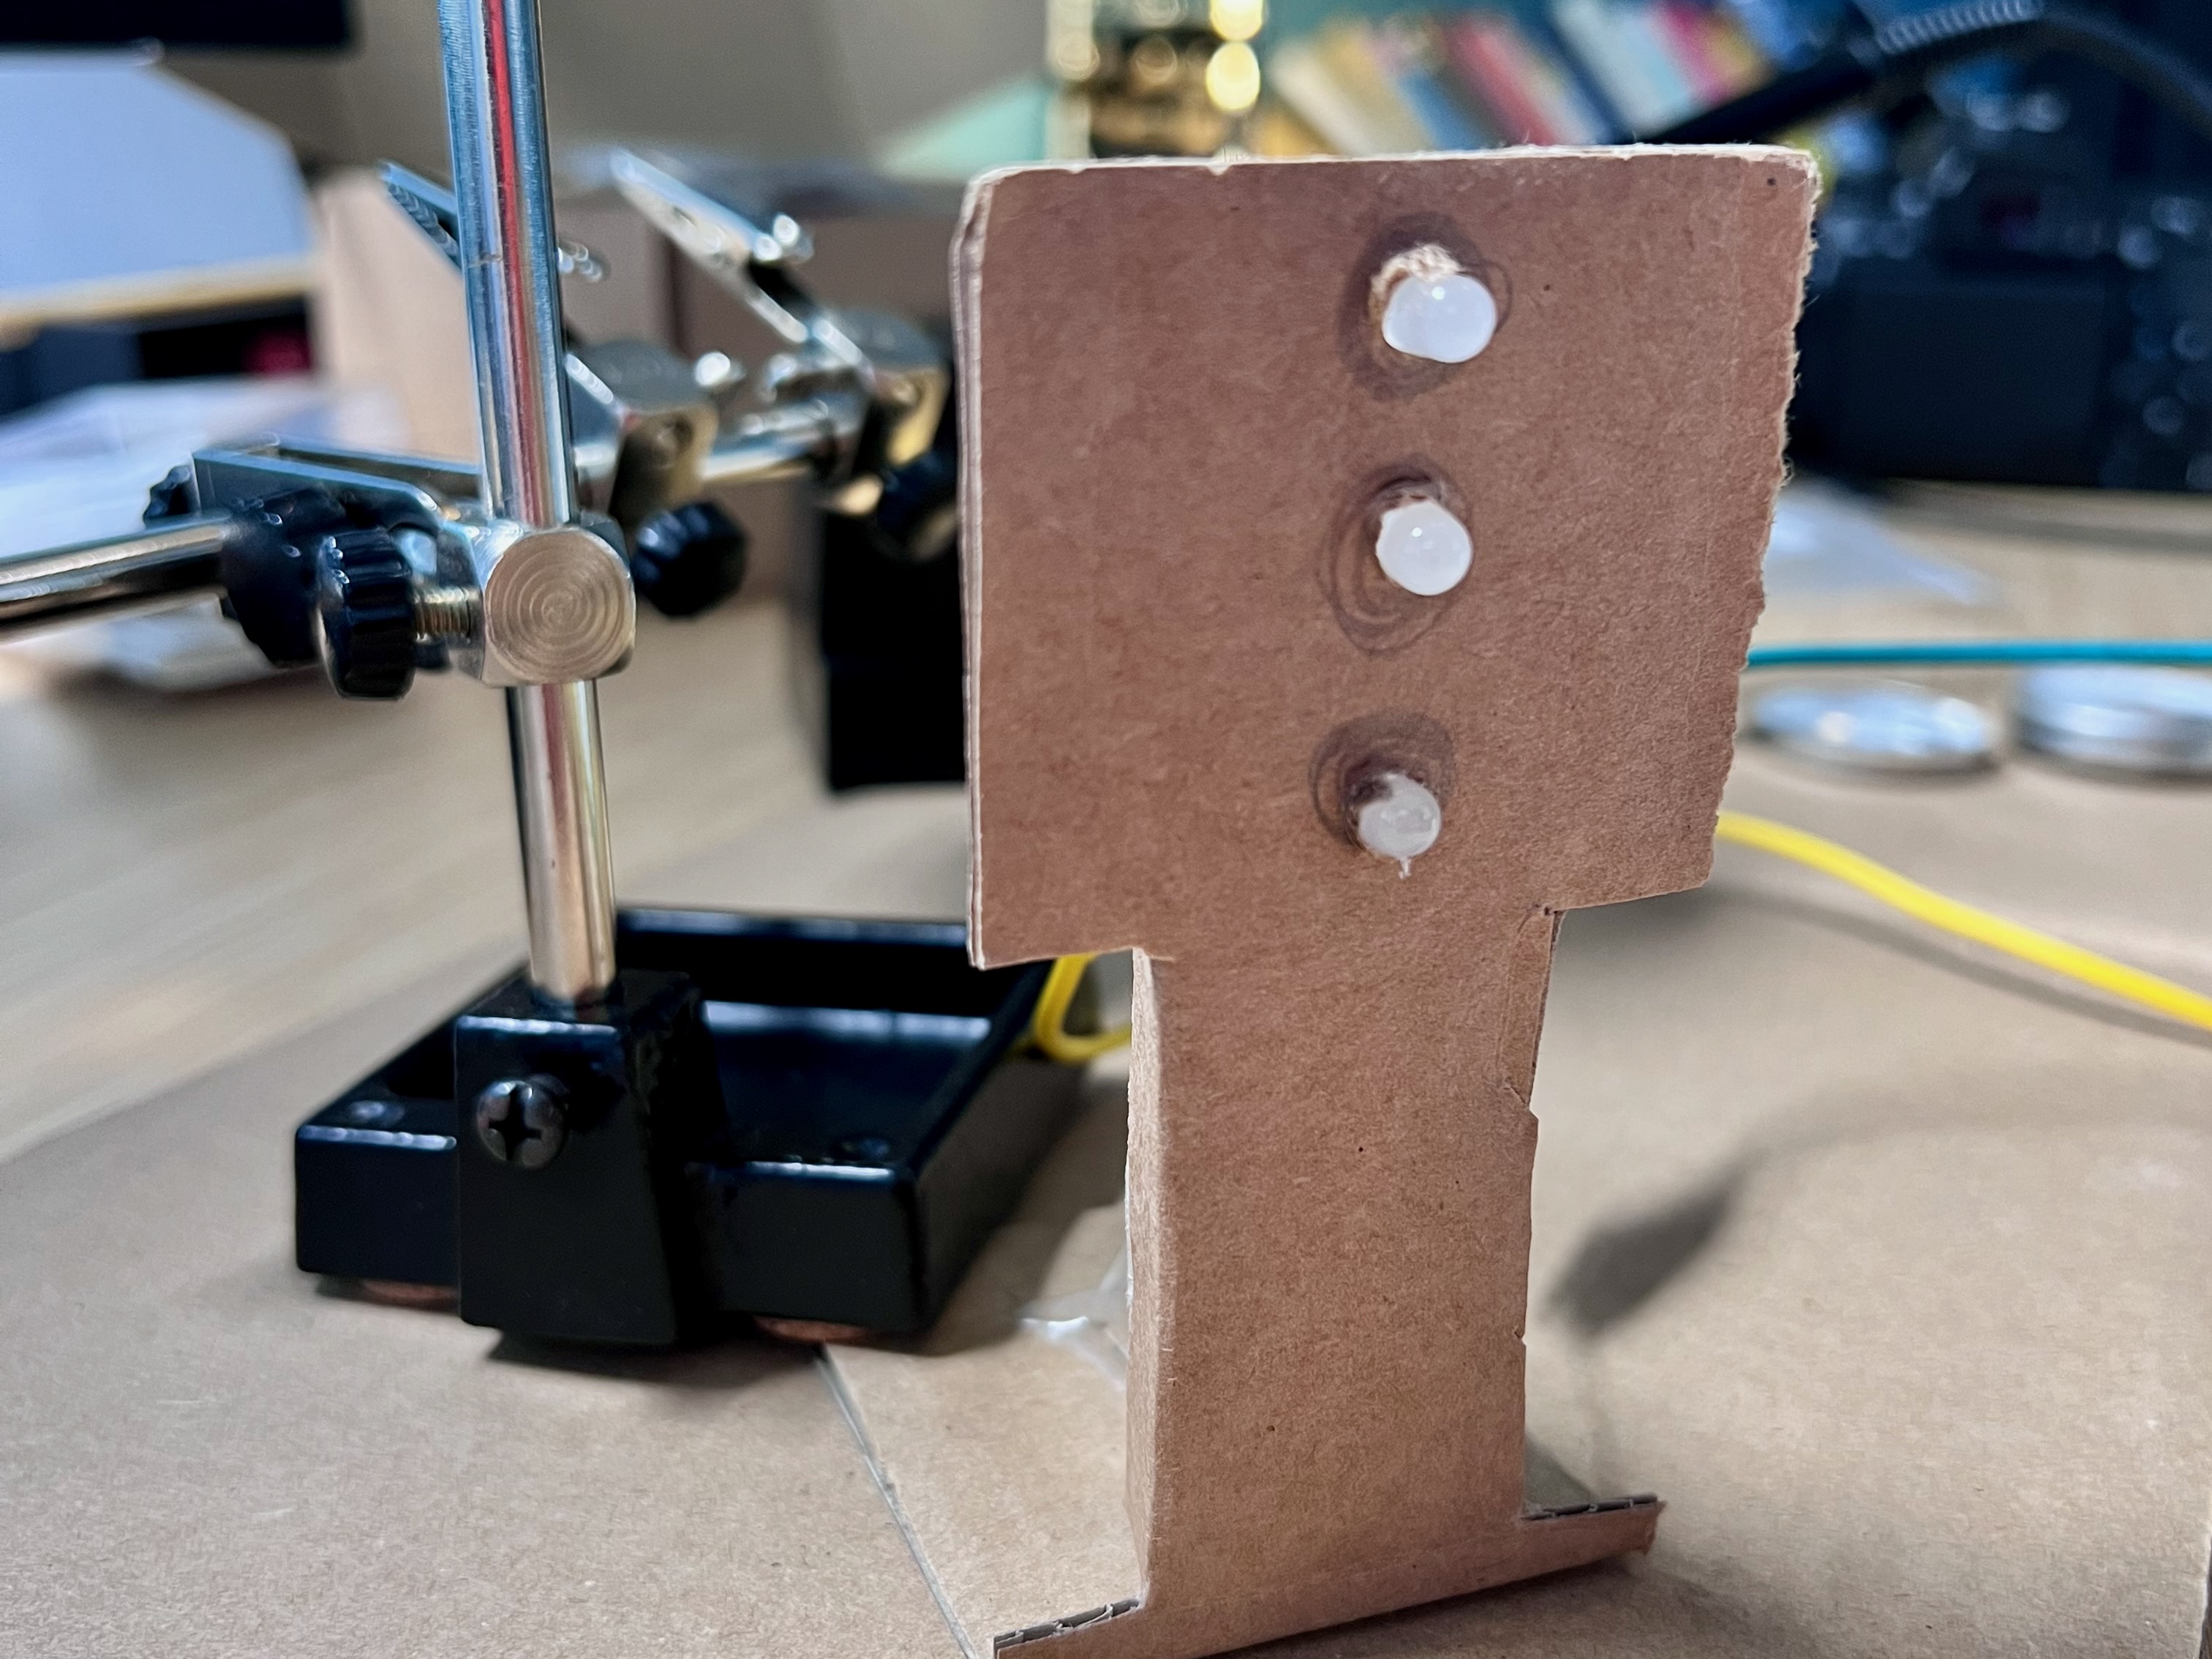
Prototype traffic light made from cardboard
It started with a prototype. We re-purposed an Amazon box, added red, yellow and green LEDs and used crocodile clips to connect the lights to power. But just lighting up wasn’t good enough. Even my son knew that . He wanted the lights to operate in sequence.
My first thought was to reach for an Arduino and to hack something together. But I had a couple of BBC micro:bit devices laying around and these seemed far more appropriate. The Microsoft MakeCode block editor is far more accessible than the Arduino IDE.
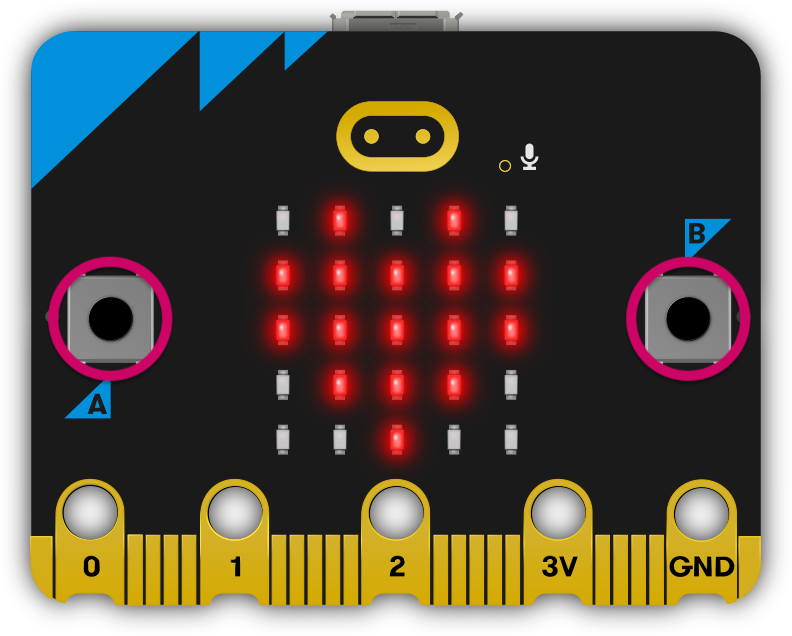
The BBC micro:bit
We used some crocodile clips to connect up our prototype traffic light.
- Red to Pin 0
- Amber to Pin 1
- Green to Pin 2
- Common to Ground
We then created a basic loop; red, yellow, green, and back to red. I added a small delay so that the sequence was visible. With the code up and running, I didn’t have to wait long for a verdict.
“That’s not right! It’s too fast.”
We increased the delay until he was happy. We then went out to check our work. Yes, we went watching traffic lights. Fun times.
“That’s not right! Red and yellow should be together!”
So we modified our code and we had a working traffic light.
But we could do better. I wasn’t too keen on our cardboard prototype. If I had 3D printer I’d have been tempted to print something. I came across these little circuit boards from Kitronic. These were perfect, complete with mounting screws for the MicroBit.
I ordered the kits rather than the fully assembled boards and my son watched as we soldered.

Kitronik traffic light kit
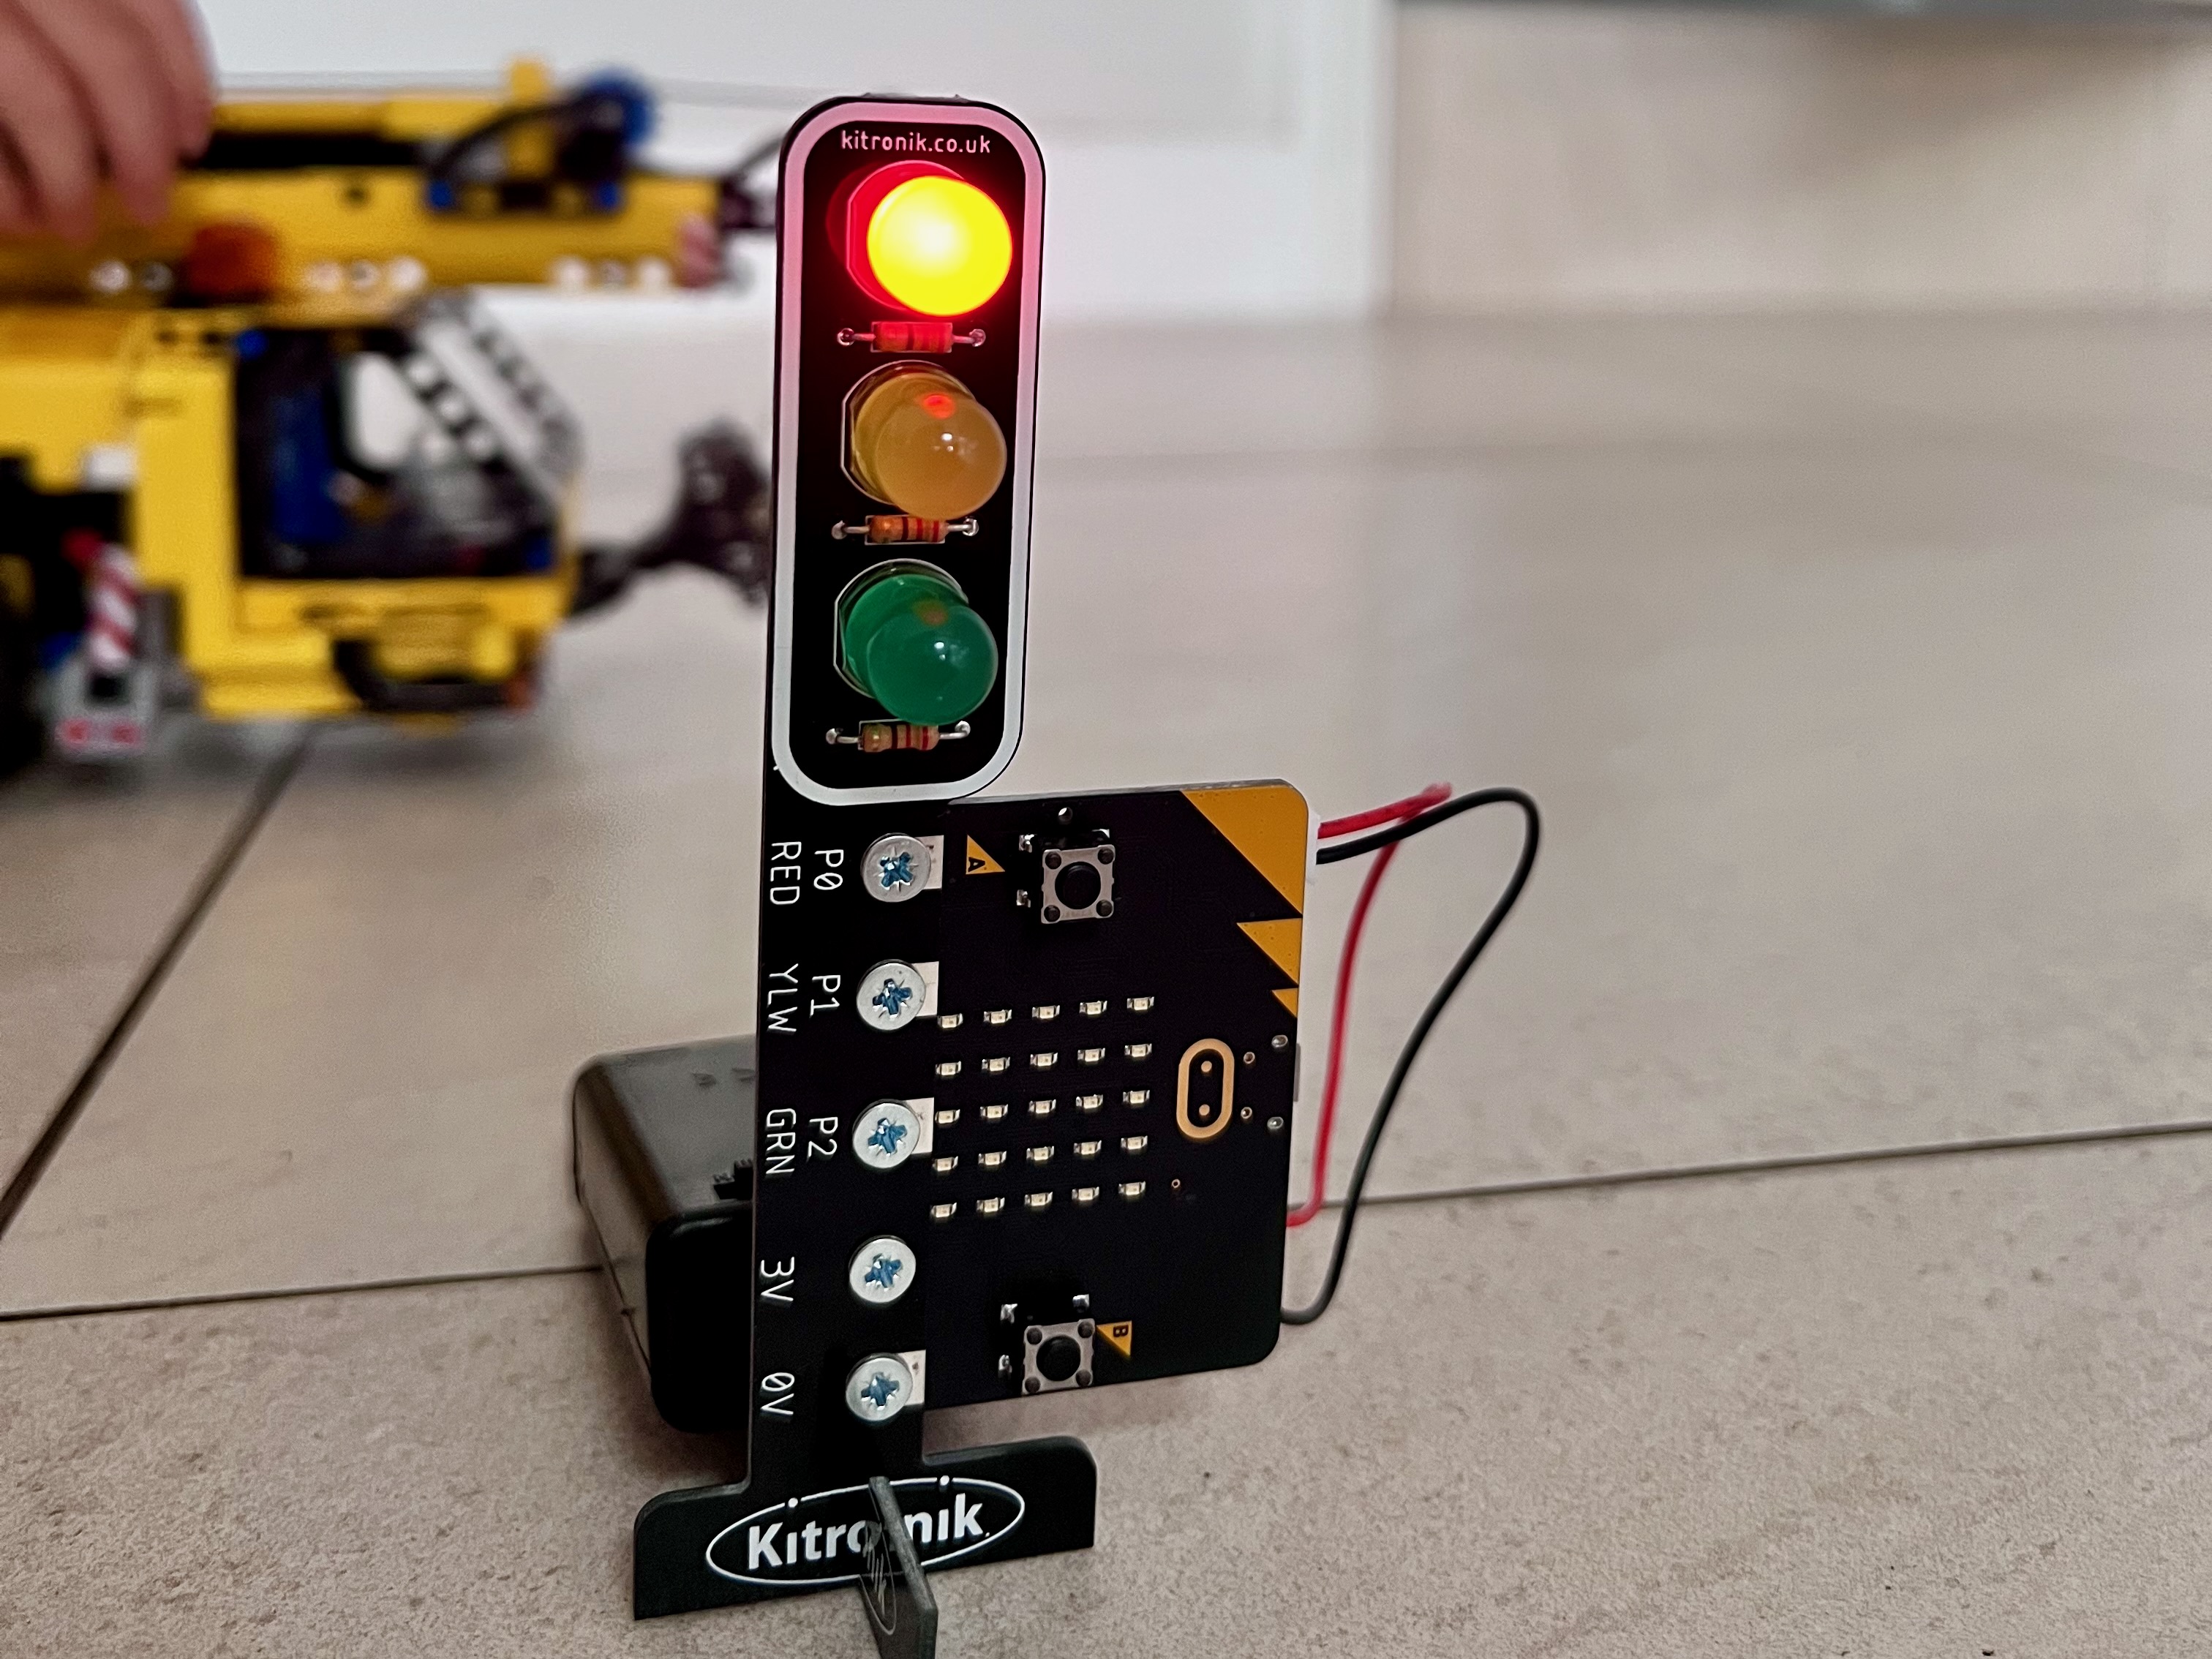
The finished traffic light with Lego "bus" in the background
Some might see this as a classic “learn to code” project. For me, this wasn’t about the code. This was an excuse to spend time together. To observe patterns and to recreate them. It was also a chance to bring renewed life to the bus route that currently winds its way around our kitchen floor.
The Microsoft MakeCode environment is briliant. Combined with the BBC MicroBit it is an incredibly well considered platform. I did notice that there were a couple of things that would have made things a little easier to explain.
- The ability to name pins, e.g. RED
- The ability to slow down execution speed or at least hide the delay steps in the loop
- The ability to rotate the LED display through 90 degrees to support different mounting configurations
Full parts list of the finished traffic light: