This post documents adding authentication to the Tanzu Application Platform (TAP) using Auth0 and Pinniped.
I often take shortcuts with authentication when demonstrating technology. In-part this is because setting up authentication and authorization can be difficult. That said, there are benefits to the flexibility of an administrative user. Like many who work with short-lived Kubernetes clusters, my default is Cluster Admin.
One downside to using cluster-admin is that I’m unable to explore RBAC capabilities. The capabilities and limitations of RBAC influence the experience of a product. The Tanzu Application Platform (TAP) is no exception. If real world use sees users mapped to one of the four default user roles that come with TAP, why do I use cluster-admin? I needed an instance of TAP configured with an identity provider that allowed me to map users to roles.
There is a guide to setting up Pinniped and TAP over in the product documentation. The official documentation served as the basis for this post, but it doesn’t document how to set up an identity provider. When things didn’t work for me, I spent longer debugging this than I’d care to admit. This post documents my set up using TAP, Auth0 and Pinniped.
If you notice any issues, or things don’t quite match this guide, let me know and I’ll try and help.
Certificates, DNS and Ingress
In this section we are going to create two files, one to define the TLS certificate and the other to define ingress to our Pinniped installation.
To do this we’ll need a namespace.
kubectl create ns pinniped-supervisor
Both the certificate and the ingress need to know the domain name details, so we’ll start by creating a DNS entry.
DNS
Create a DNS entry for your Pinniped endpoint. I’m using pinniped-supervisor.tap.tanzu.xyz in this example. Point it to the IP address of your TAP ingress. I will refer to this as your {PINNIPED_DOMAIN}.
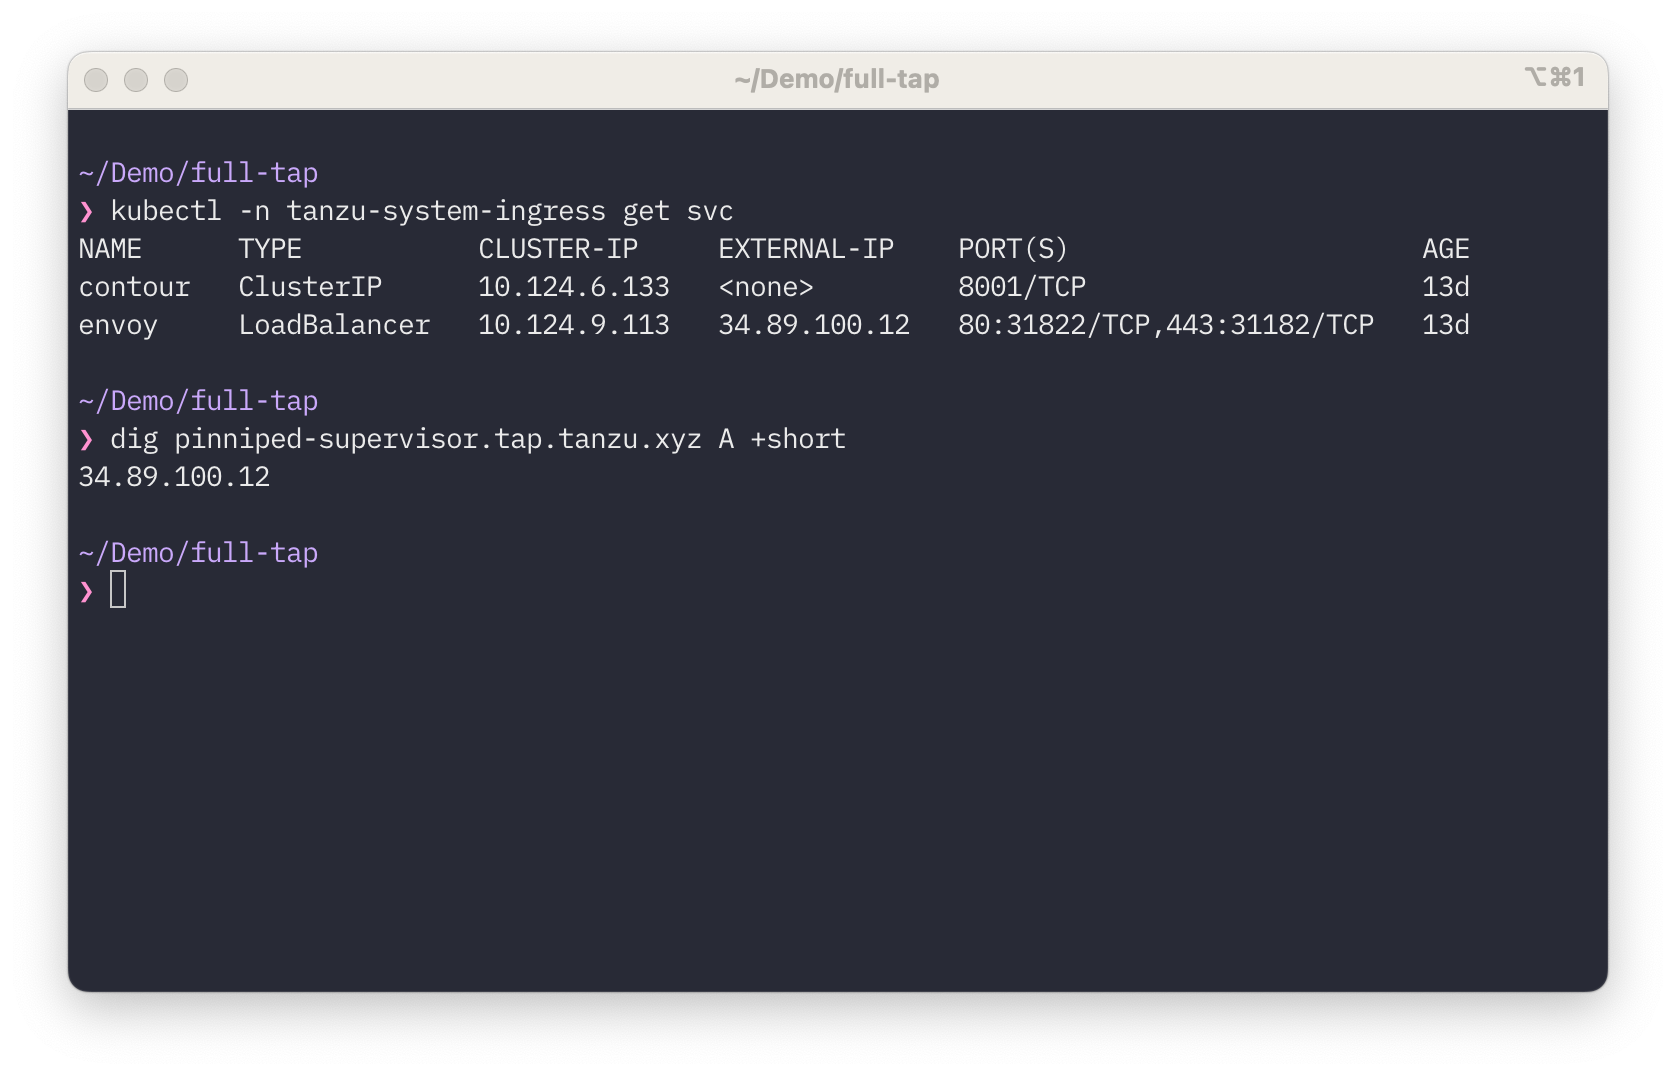
Confirmation of your DNS Entry
Check that the DNS entry you are going to use for Pinniped is pointing to your Envoy Load Balancer.
TLS Certificate
I am assuming you have a cert-manager ClusterIssuer set-up to issue certificates in your cluster. I’m using LetsEncrypt and have called my ClusterIssuer, letsencrypt-prod. For information on how to set this up see the cert-manager documentation.
Create a certificate for your {PINNIPED_DOMAIN} and apply it to the cluster. Create a file certificate.yaml. An example of the contents is show below. You’ll need to replace the dnsNames entry with your {PINNIPED_DOMAIN}.
apiVersion: cert-manager.io/v1
kind: Certificate
metadata:
  name: pinniped-supervisor-cert
  namespace: pinniped-supervisor
spec:
  secretName: pinniped-supervisor-tls-cert
  dnsNames:
  - pinniped-supervisor.tap.tanzu.xyz
  issuerRef:
    name: letsencrypt-prod
    kind: ClusterIssuer
kubectl create -f certificate.yaml
Validate the certificate is available and ready to use.
kubectl get cert pinniped-supervisor-cert -n pinniped-supervisor
NAME                       READY   SECRET                         AGE
pinniped-supervisor-cert   True    pinniped-supervisor-tls-cert   2m
Ingress
Create a file, ingress.yaml. An example of the contents is show below. You’ll need to replace the fqdn entry with the {PINNIPED_DOMAIN}.
---
apiVersion: v1
kind: Service
metadata:
  name: pinniped-supervisor
  namespace: pinniped-supervisor
spec:
  ports:
  - name: pinniped-supervisor
    port: 8443
    protocol: TCP
    targetPort: 8080
  selector:
    app: pinniped-supervisor

---
apiVersion: projectcontour.io/v1
kind: HTTPProxy
metadata:
  name: pinniped-supervisor
  namespace: pinniped-supervisor
spec:
  virtualhost:
    fqdn: pinniped-supervisor.tap.tanzu.xyz
    tls:
      secretName: pinniped-supervisor-tls-cert
  routes:
  - services:
    - name: pinniped-supervisor
      port: 8443
Create the Service and HTTPProxy
kubectl create -f ingress
Auth0 Set-Up
Armed with the {PINNIPED_DOMAIN} you should now have everything you need to set up the Auth0 application.
Application Settings
Log into Auth0 and navigate to the application settings.
Settings Tab:
- Use the default application - rename it if you like
- make a note of the application domain
{AUTH0_DOMAIN} - Make a note of the Client ID
{AUTH0_CLIENT_ID} - Make a note of the Client Secret
{AUTH0_CLIENT_SECRET} - Leave the Application Type unset
- Leave the Token Endpoint Authentication Method as
POST - Leave the Application Login URI empty
- Enter the Callback URL. This is
https://{PINNIPED_DOMAIN}/callback.
Connections Tab:
- Make sure there is at least one connection enabled
I used the Username-Password-Authentication connection instead of social connections like Google, or GitHub because it allows me to create a handful of user accounts using dummy email addresses.
Using Groups or Roles
Because Auth0 (and the OIDC spec) do not support the use of Groups claims, I created a custom claim to pass the Auth0 user role as part of the identity token. To set this up you need to create a Login Flow. You find this under the Actions menu on the left-hand navigation pane. Create a custom action and add it to the login flow.
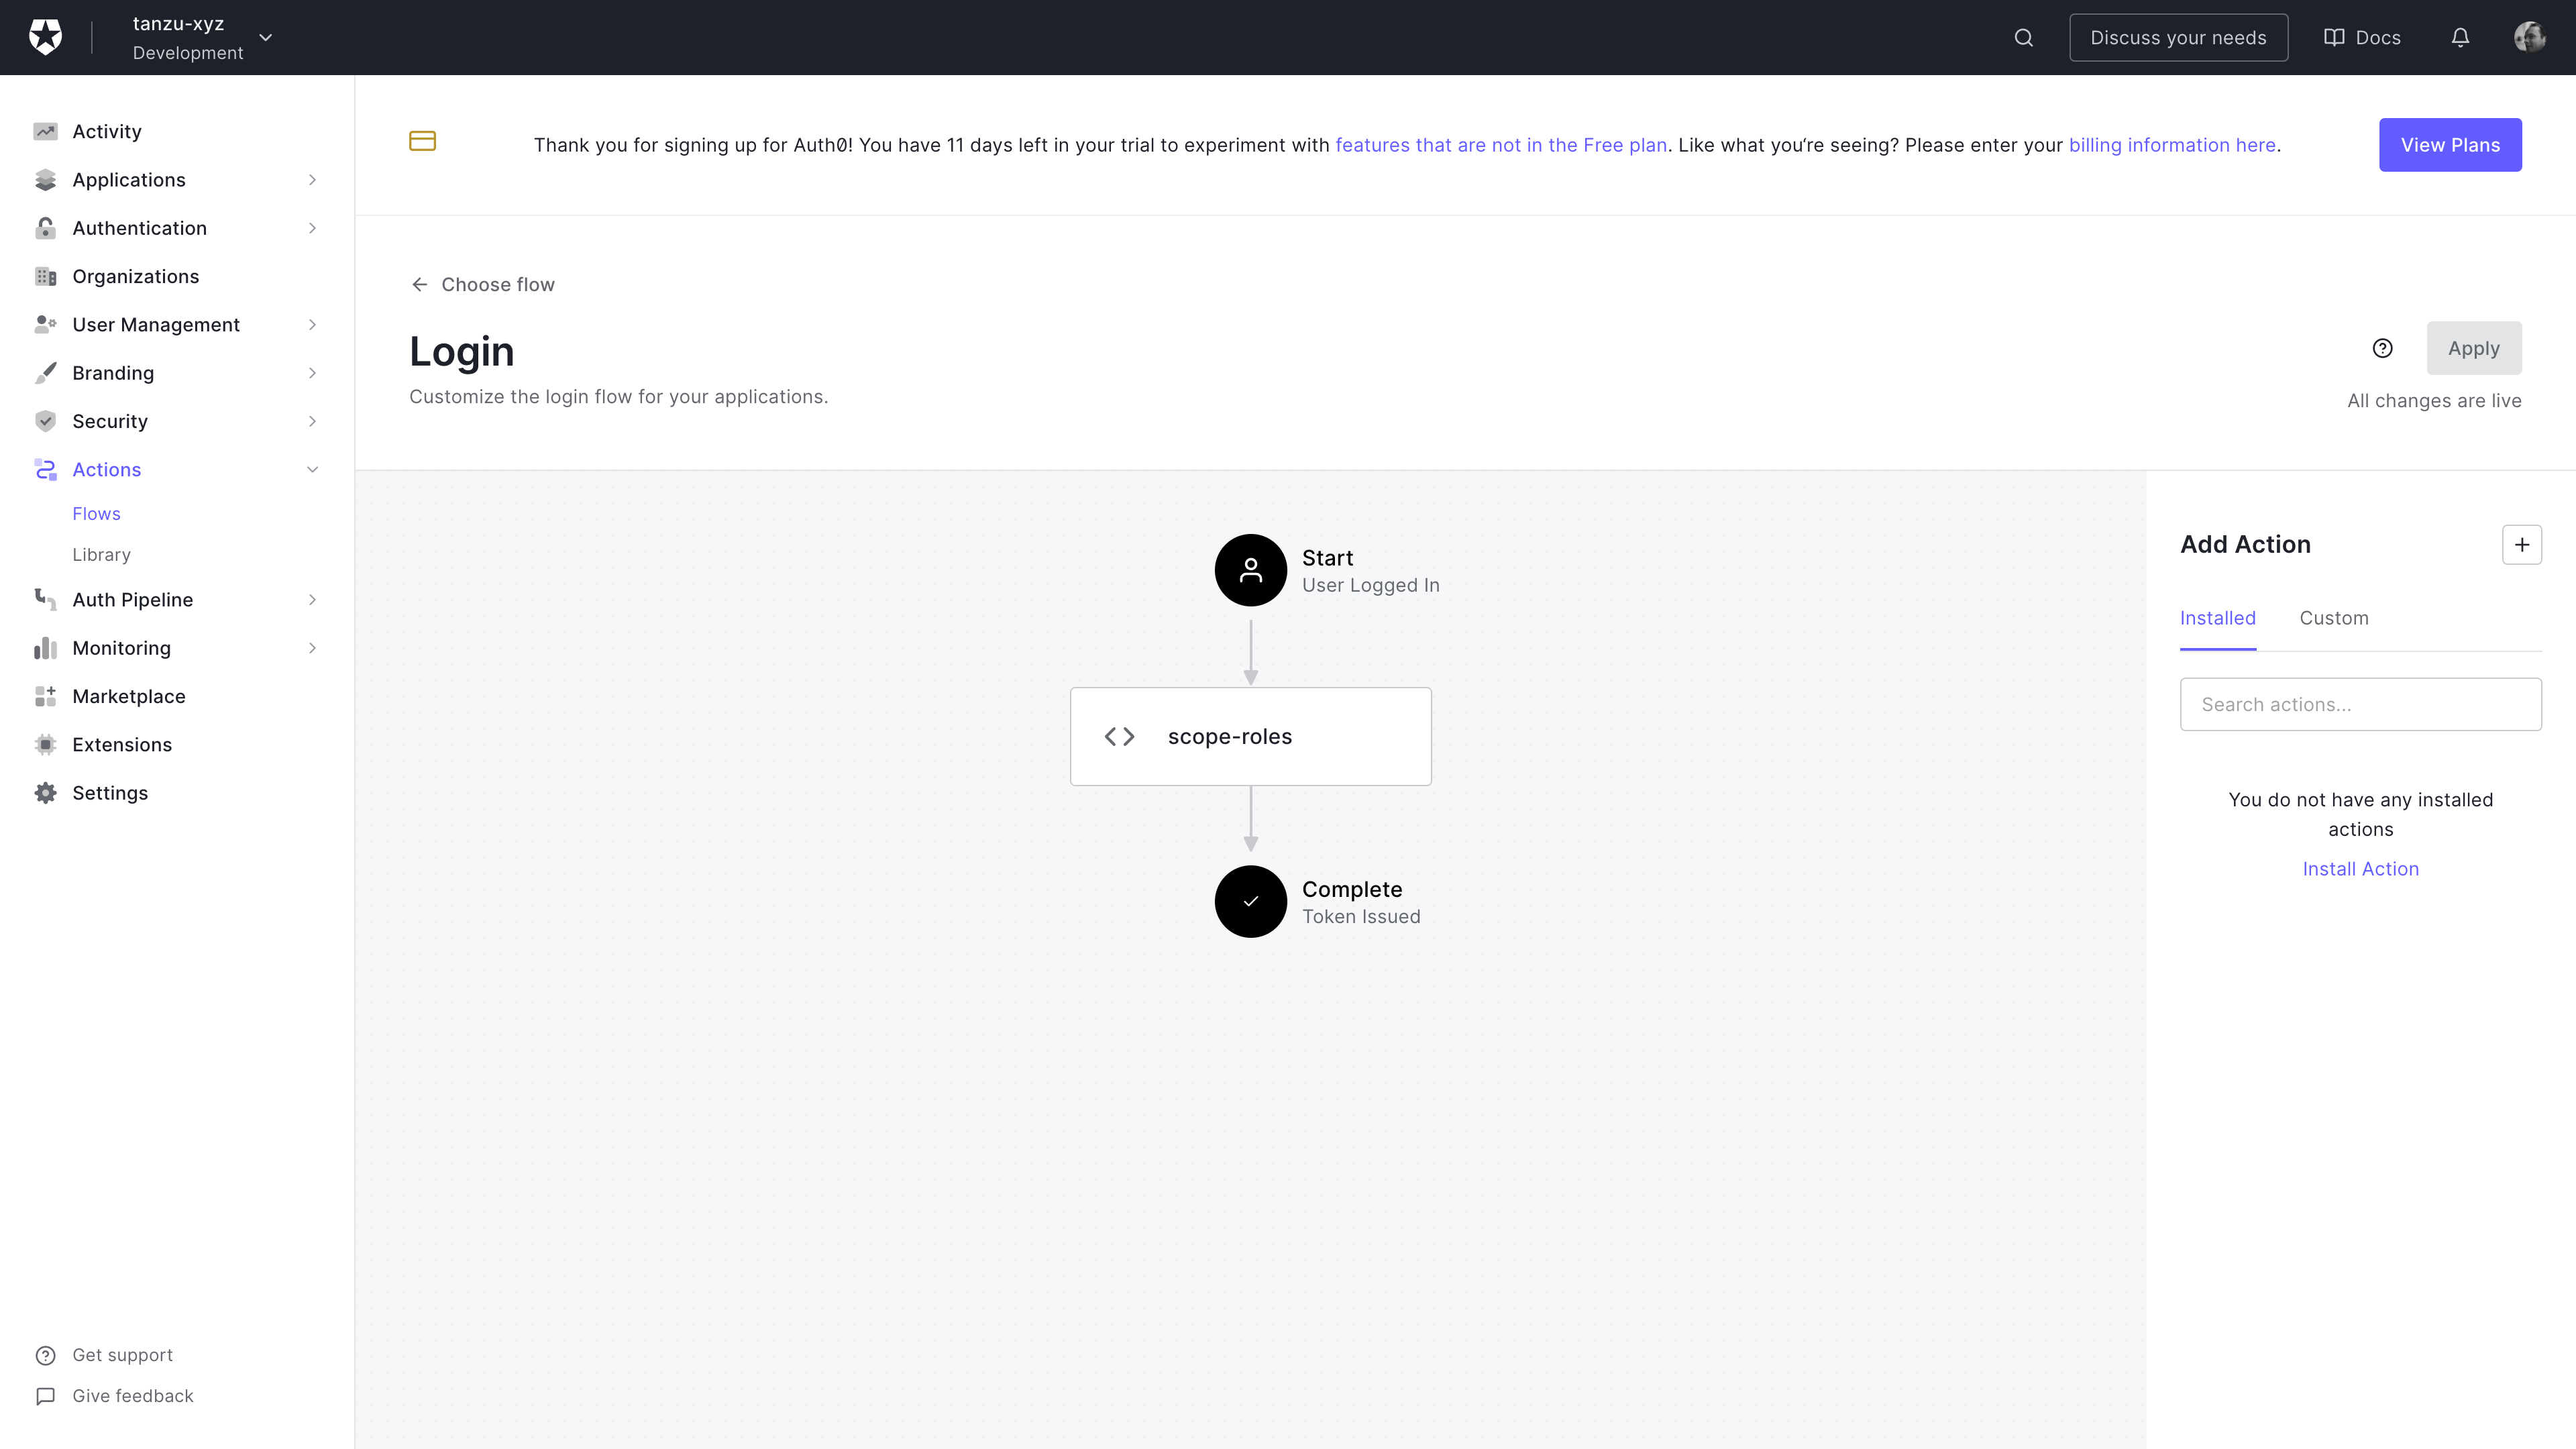
Auth0 login flow configuration
In this screenshot, I have added a custom scope-roles action between start and complete.
Edit the code for your custom action to return the Auth0 user roles in the identity token. You need to use a custom prefix for the groups claim or Auth0 will reject the action.
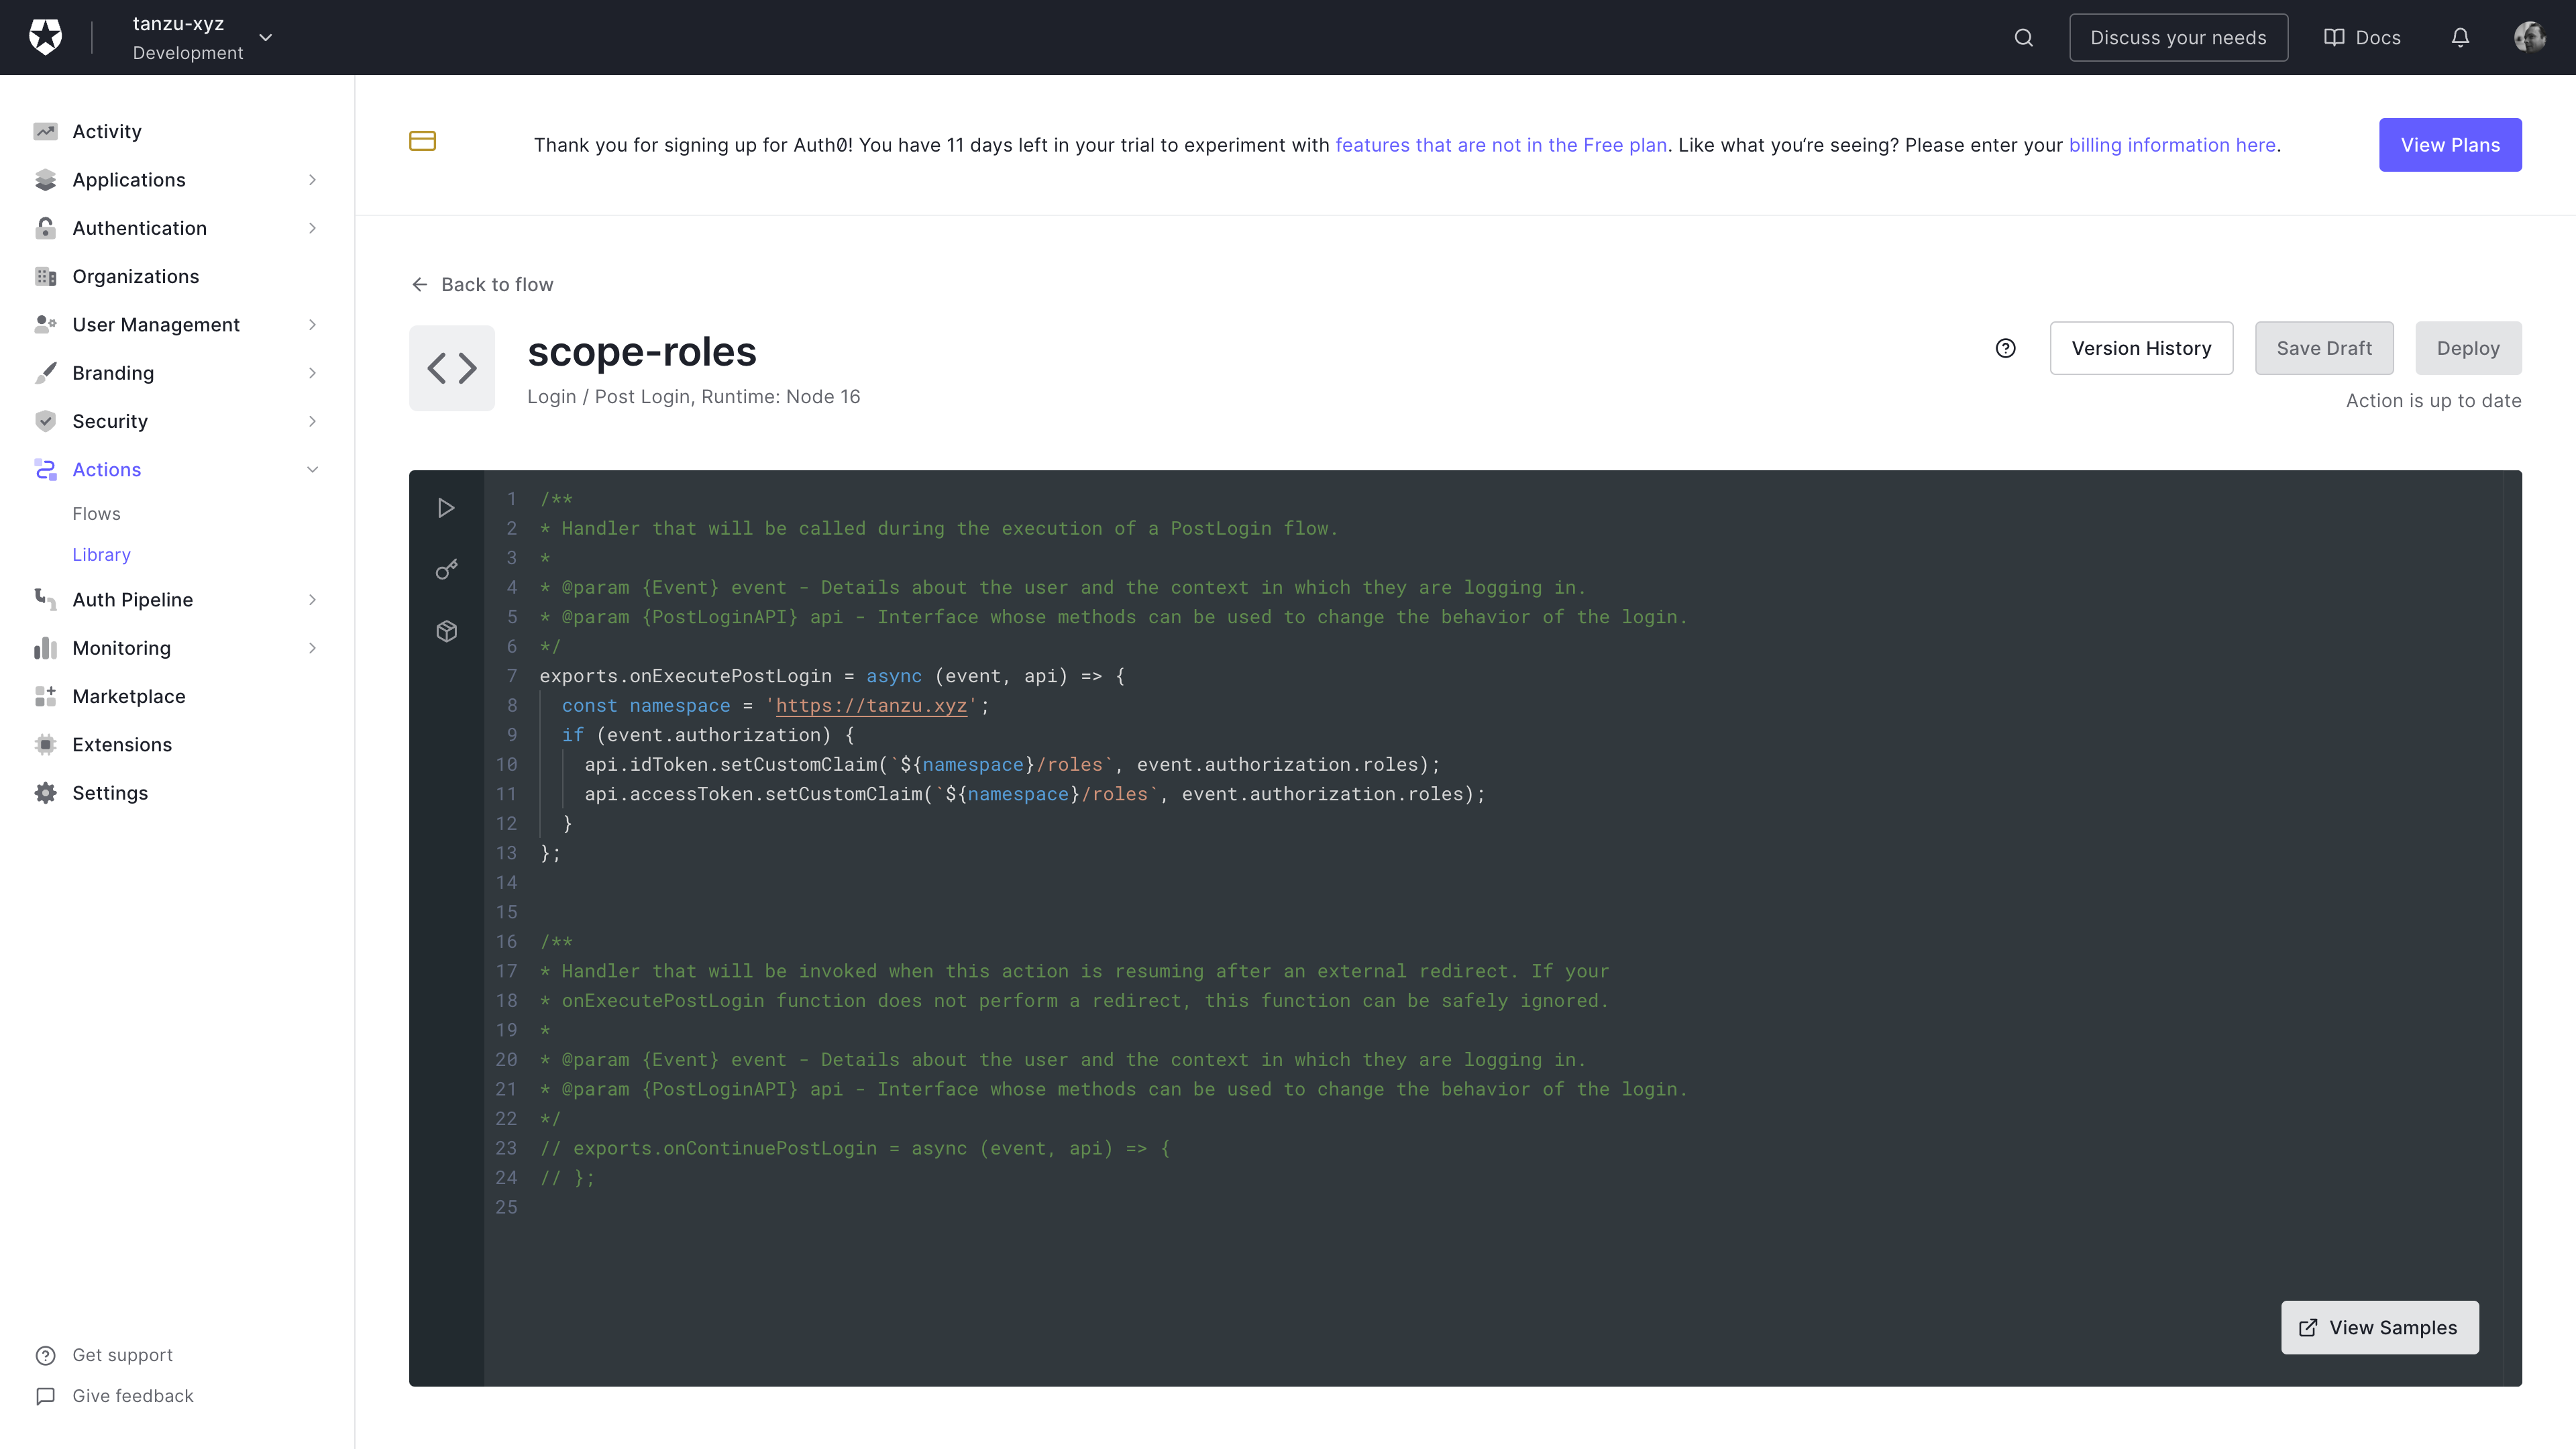
Auth0 custom login action
Modify the custom action to include the code shown below.
The code I used for my action is shown below. Note, you’ll want to use a unique prefix value and assign it to the namespace variable. This has to be a URL. I will refer to this value as the {OIDC_GROUP_PREFIX}.
exports.onExecutePostLogin = async (event, api) => {
  const namespace = 'https://tanzu.xyz';
  if (event.authorization) {
    api.idToken.setCustomClaim(`${namespace}/roles`, event.authorization.roles);
    api.accessToken.setCustomClaim(`${namespace}/roles`, event.authorization.roles);
  }
};
Pinniped Set-Up
There are two parts to the Pinniped install, the supervisor and then the concierge. For details of the Pinniped architecture, I’d recommend reading the documentation on the Pinniped site.
Supervisor
First create a folder to hold supervisor configuration.
mkdir supervisor
Inside this folder, create a file, oidc_identity_provider.yaml to hold the details of the Auth0 application. An example is shown below, but modify the following properties with instance specific values.
In the OIDCIdentityProvider:
spec.issuershould be{AUTH0_DOMAIN}spec.authorizationConfig.additionalScopesshould include{OIDC_GROUP_PREFIX}/groupsspec.claims.groupsshould be{OIDC_GROUP_PREFIX}/groups
In the Secret:
stringData.clientIDshould be {AUTH0_CLIENT_ID}stringData.clientSecretshould be {AUTH0_CLIENT_SECRET}
In the FederationDomain:
spec.issuershould be https://{PINNIPED_DOMAIN}
apiVersion: idp.supervisor.pinniped.dev/v1alpha1
kind: OIDCIdentityProvider
metadata:
  namespace: pinniped-supervisor
  name: auth0
spec:
  issuer: https://tanzu-xyz.eu.auth0.com/
  authorizationConfig:
    additionalScopes: ["openid", "email", "https://tanzu.xyz/roles"]
    allowPasswordGrant: false
  claims:
    username: email
    groups: https://tanzu.xyz/roles
  client:
    secretName: auth0-client-credentials

---
apiVersion: v1
kind: Secret
metadata:
  namespace: pinniped-supervisor
  name: auth0-client-credentials
type: secrets.pinniped.dev/oidc-client
stringData:
  clientID: "*************************"
  clientSecret: "*************************"

---
apiVersion: config.supervisor.pinniped.dev/v1alpha1
kind: FederationDomain
metadata:
  name: pinniped-supervisor-federation-domain
  namespace: pinniped-supervisor
spec:
  issuer: https://pinniped-supervisor.tap.tanzu.xyz
  tls:
    secretName: pinniped-supervisor-tls-cert
Install the Pinniped Supervisor. I used version 0.12 in the command below. Note that this is not the latest version.
kapp deploy -y --app pinniped-supervisor --into-ns pinniped-supervisor -f supervisor -f https://get.pinniped.dev/v0.12.0/install-pinniped-supervisor.yaml
Validate the OIDCIDentityProvider has been deployed correctly.
kubectl -n pinniped-supervisor get OIDCIdentityProvider
NAME    ISSUER                            STATUS   AGE
auth0   https://tanzu-xyz.eu.auth0.com/   Ready    4d4h
Concierge
First create a folder to hold supervisor configuration.
mkdir concierge
Inside this folder, create a file, jwt_authenticator.yaml to hold the details of the Auth0 application. An example is shown below, modify the following properties to reflect instance specific values.
spec.issuershould be https://{PINNIPED_DOMAIN}spec.audienceshould be a string unique to this cluster
---
apiVersion: authentication.concierge.pinniped.dev/v1alpha1
kind: JWTAuthenticator
metadata:
  name: pinniped-jwt-authenticator
spec:
  issuer: https://pinniped-supervisor.tap.tanzu.xyz
  audience: concierge-audience-for-tap-cluster-sdfasdf
Install the Pinniped Concierge. I used version 0.12 in the command below. Note that this is not the latest version.
kapp deploy -y --app concierge -f https://get.pinniped.dev/v0.12.0/install-pinniped-concierge-crds.yaml -f https://get.pinniped.dev/v0.12.0/install-pinniped-concierge.yaml
Retrieve the Kubeconfig for the cluster. Note that here I’m storing it in a separate file auth0-kube.config. I do this to keep it separate from my cluster-admin configuration.
pinniped get kubeconfig --oidc-scopes offline_access,openid,pinniped:request-audience > auth0-kube.config
User Set-Up
Before logging in, create some users in Auth0 and map them to roles.
Roles
I created the four default user roles defined in TAP and added a cluster-admin role.
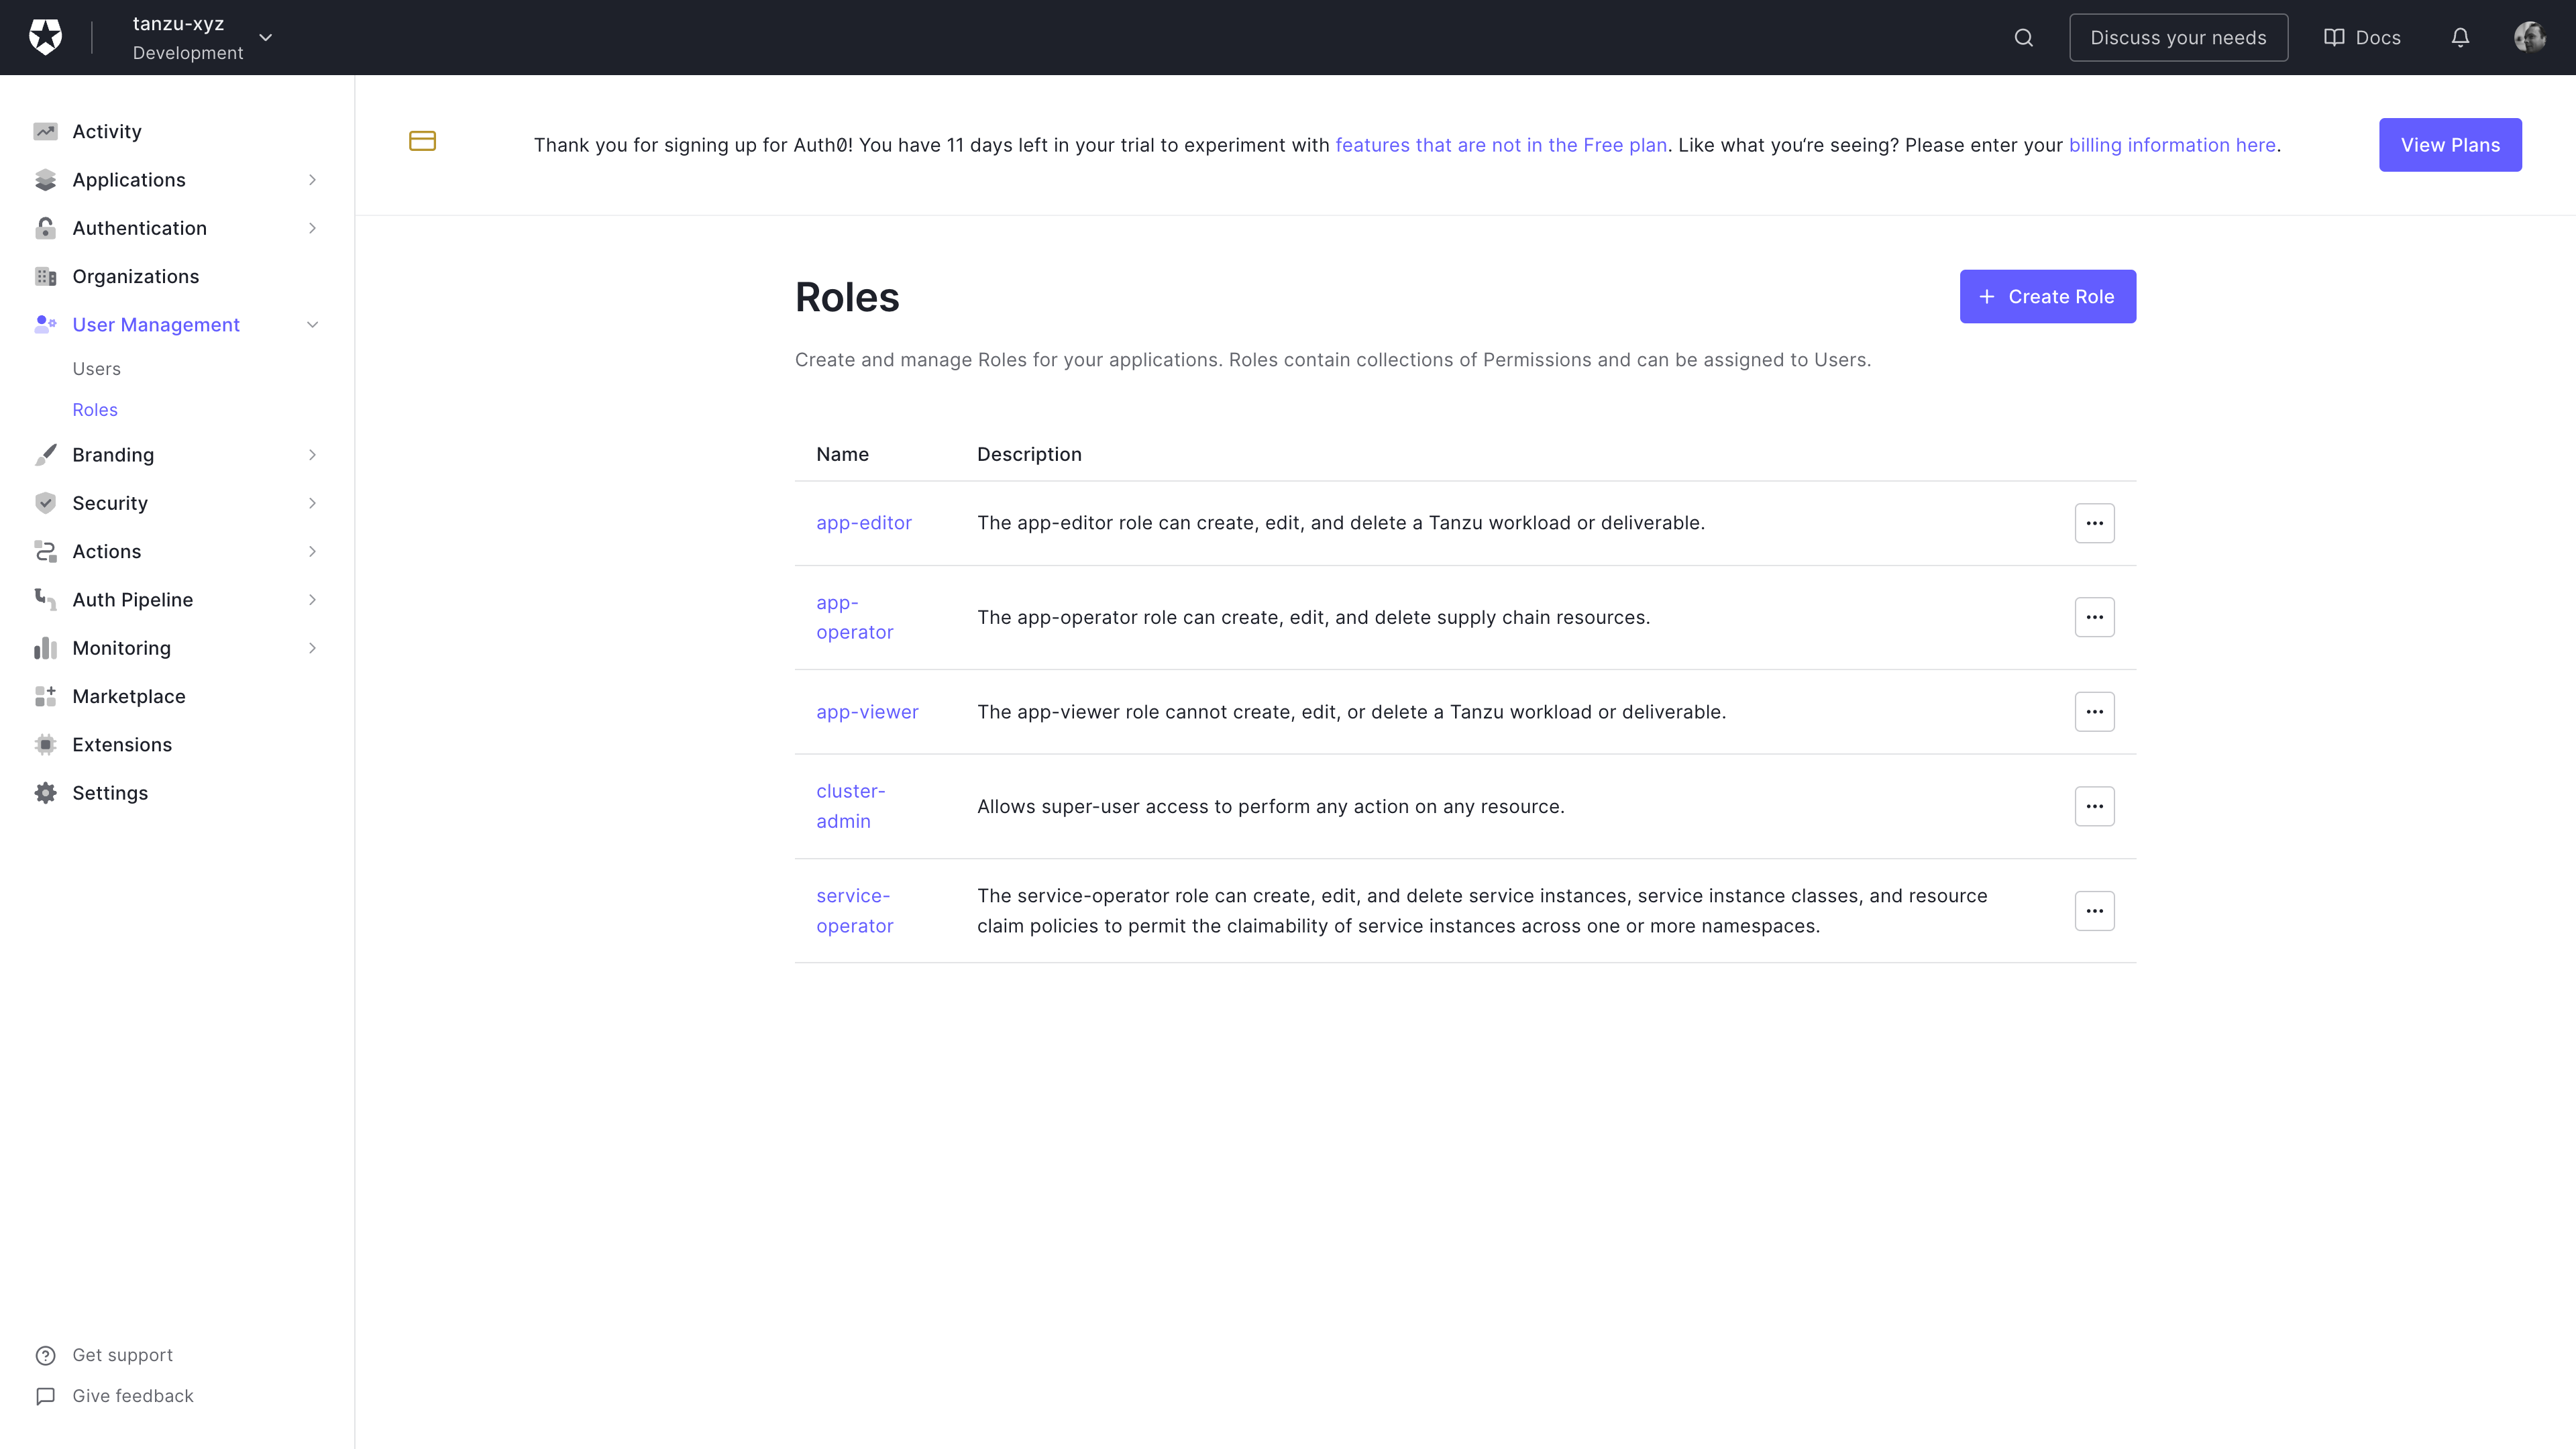
Auth0 Role creation screen
Create as many roles as you need. In this screenshot I’m showing the TAP default roles.
Users
Create some users and be sure to map them to one or more of the roles you created in the previous step.
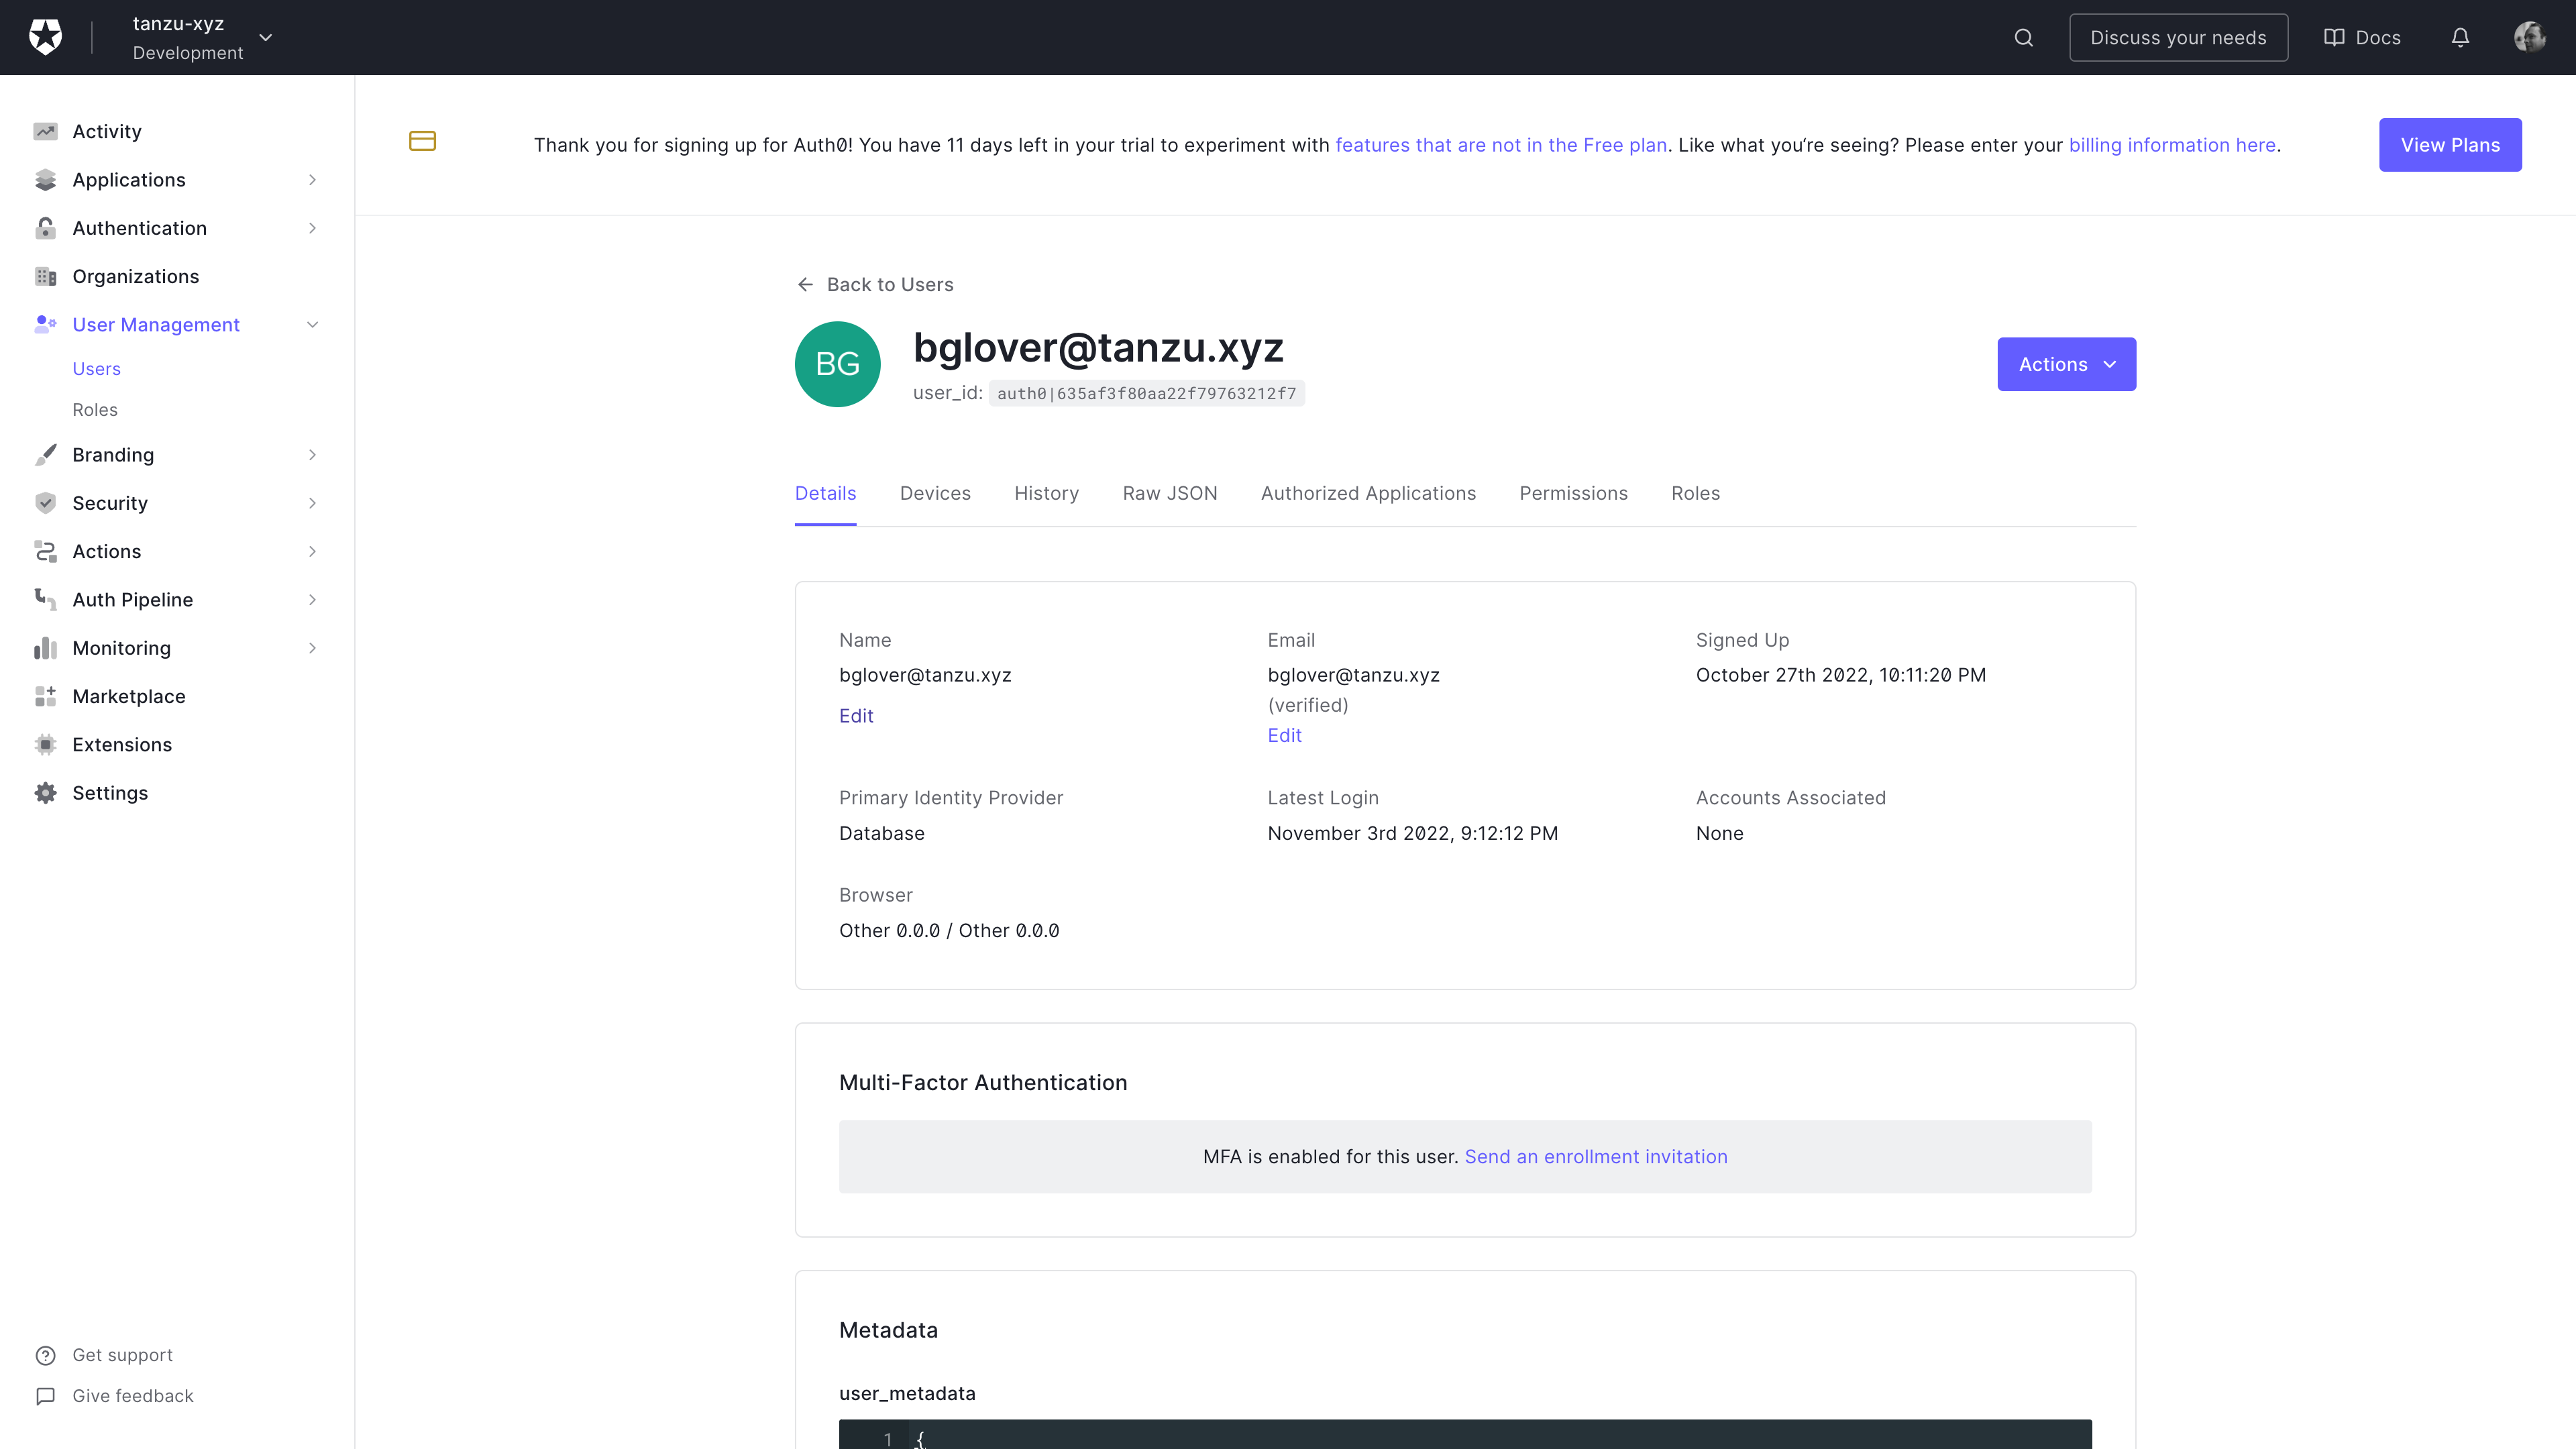
Auth0 User details screen
Ensure that the user email address is showing as verified.
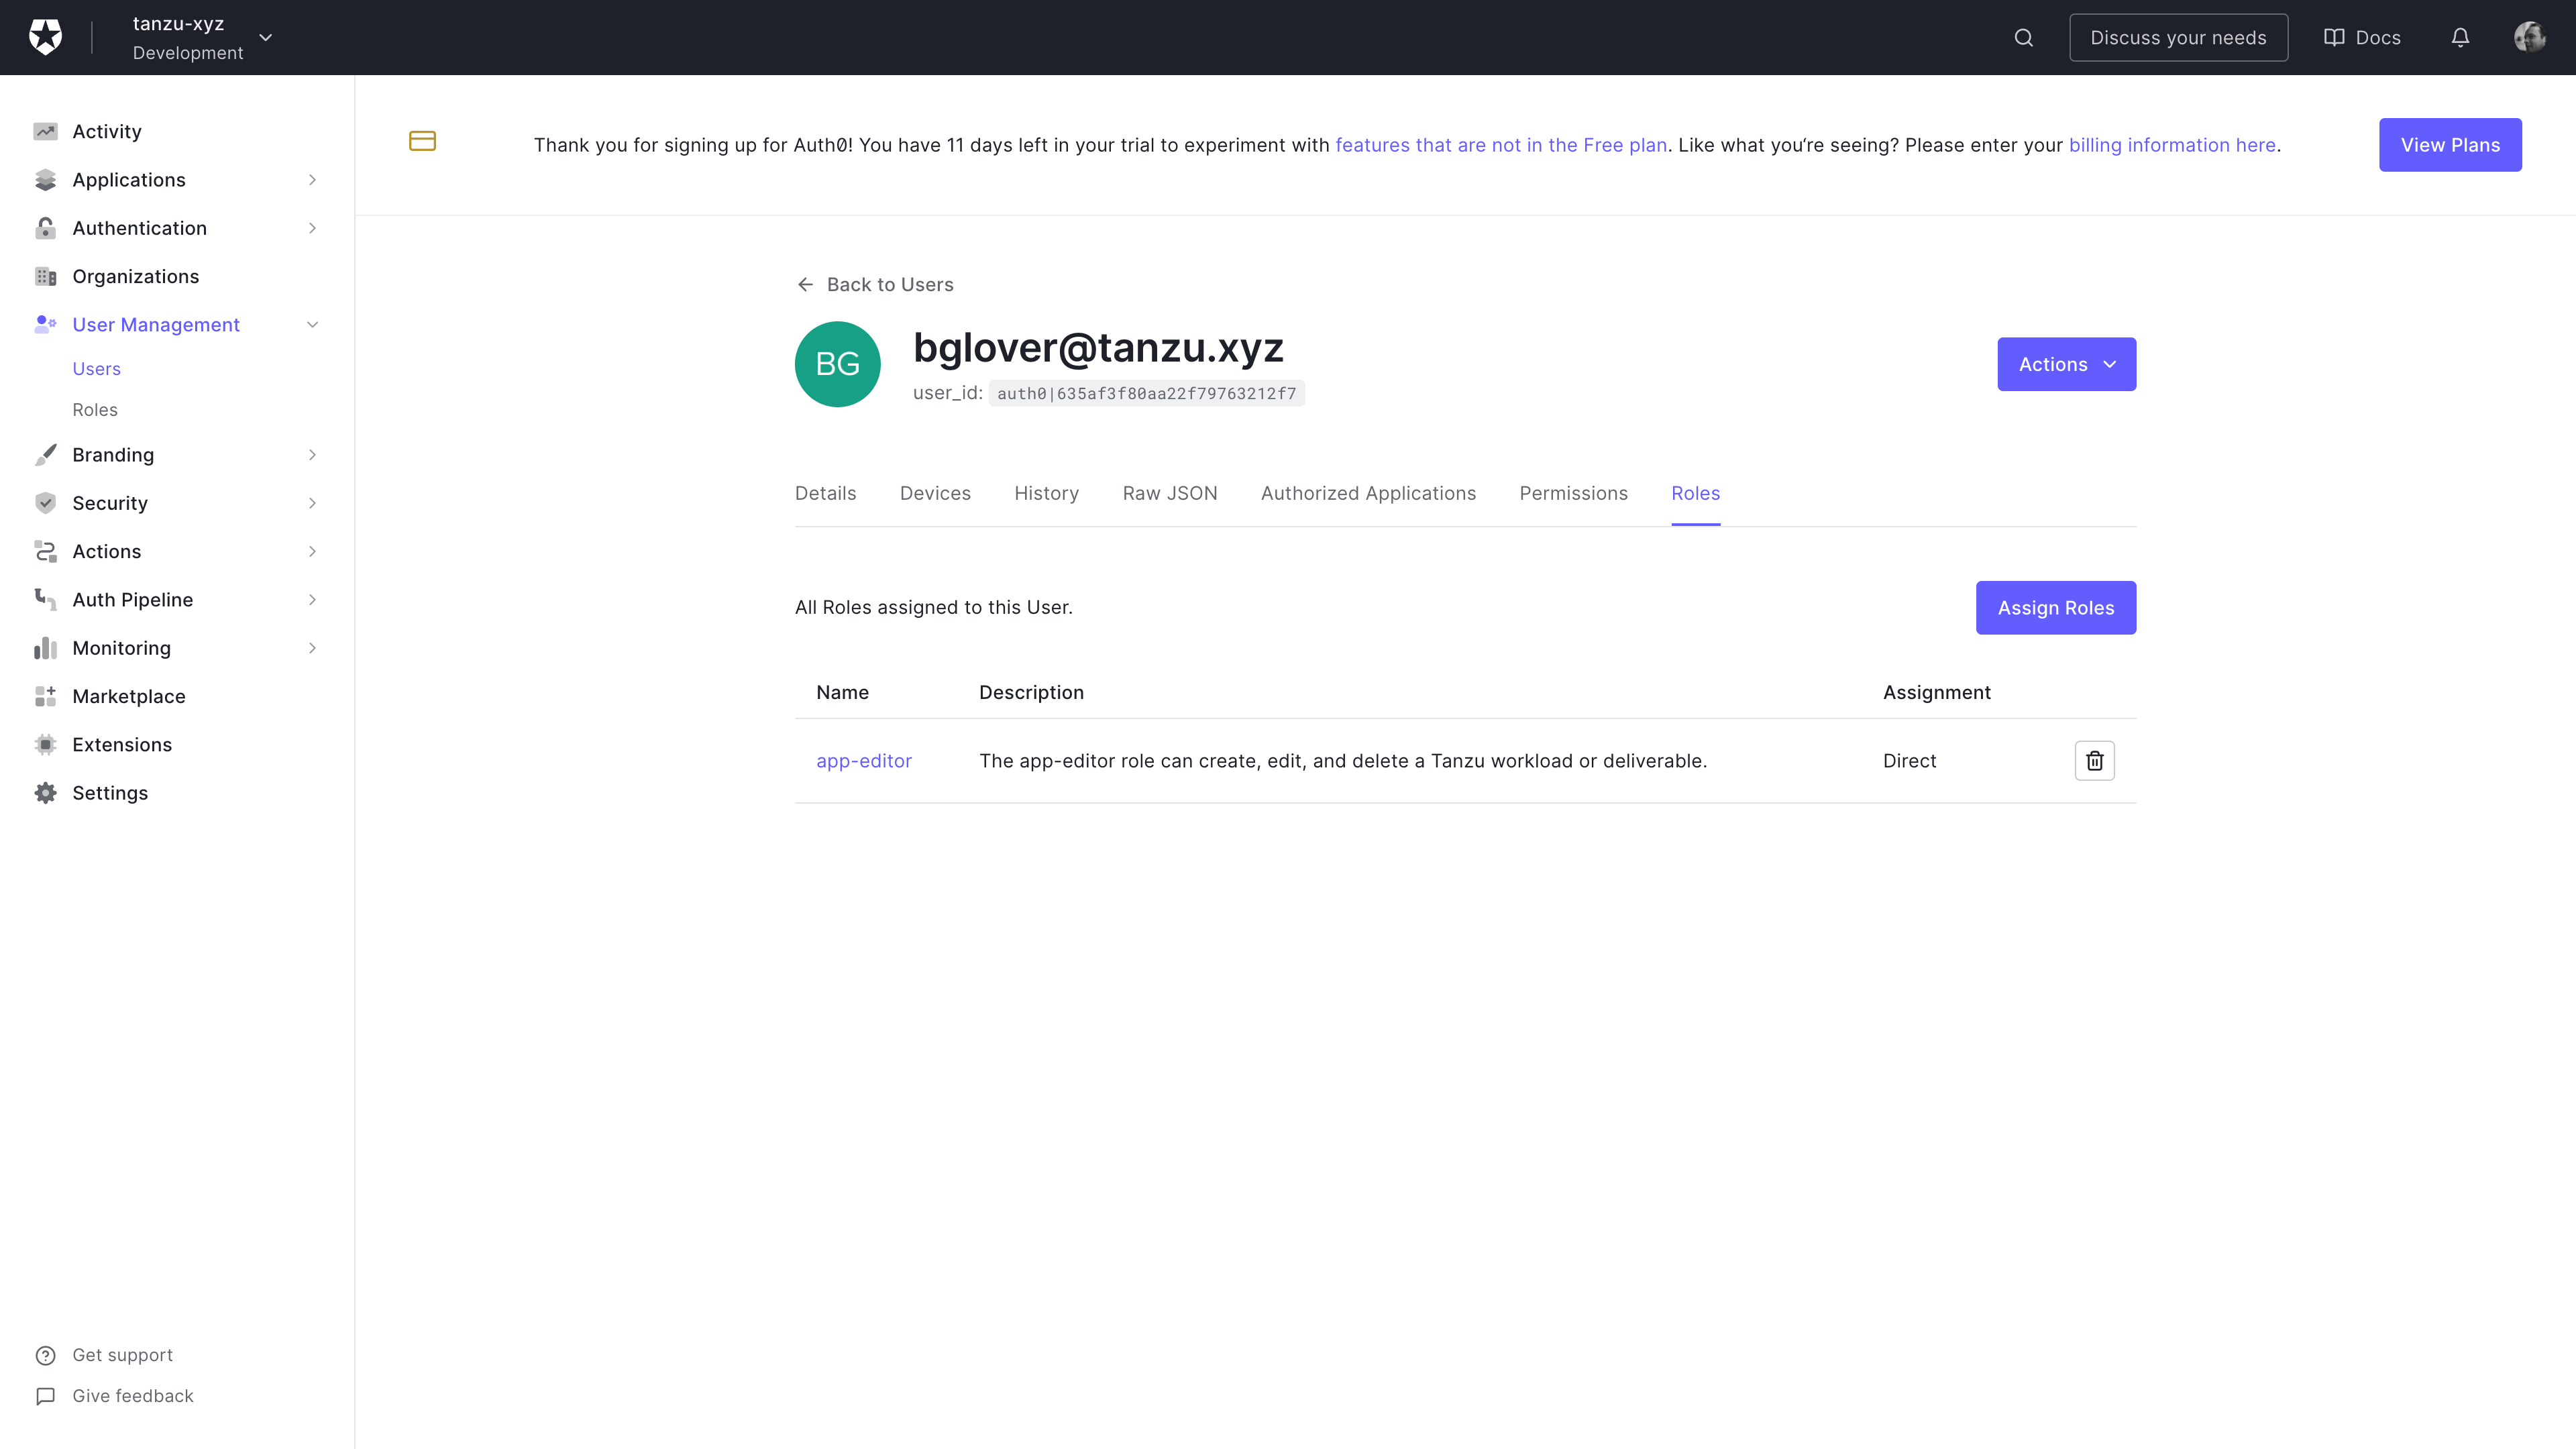
Auth0 User roles screen
Ensure that the user is mapped to at least one role.
Mapping
Map the groups (aka Auth0 roles) to Roles in Kubernetes. The Tanzu CLI has an authentication plugin to help with this. Using the CLI avoids having to type out RoleBindings.
tanzu rbac --kubeconfig ~/.kube.config binding add --group app-editor --role app-editor --namespace dev
tanzu rbac --kubeconfig ~/.kube.config binding add --group app-operator --role app-operator --namespace dev
tanzu rbac --kubeconfig ~/.kube.config binding add --group app-viewer --role app-viewer --namespace dev
tanzu rbac --kubeconfig ~/.kube.config binding add --group service-operator --role service-operator --namespace dev
Log-In
Use the auth0-kube.config file to access the cluster. A browser window will prompt you to log in to Auth0.
kubectl --kubeconfig auth0-kube.config get po -n dev